First, this is mainly relevant for people who NEED everything in a single track so they can SCORE it on a single Stave. Otherwise, just use separate tracks and be done with it ![]()
In tinkering with using a bunch of different ‘Agent Kits’ over different channels, but through a single DAW track…
I found that as long as everything comes from a single instance of GA4, it does a pretty good job of automatically mapping things out so that all of the instruments are available through a single track.
However, maps imported directly from GA4 would not let me change the channel or port. This might be a problem if you want to trigger stuff in a different plugin, or instance of GA4 from this same ‘drum track’.
An obvious option is to start a ‘fresh/new Drum Map, or begin with the GM Map as your base’ (these maps allow changing the channel and ports at will)…but going down the list and setting every single piece all over again is a bit time consuming and annoying.
So, what if I’m set on doing all this from a single track, and I want to start out with a base Acoustic Agent Kit, and just borrow a few pieces from another kit on a another channel or even a different instance or VSTi? What if I want to be able to do this at any time during my project, without any extra ‘inserts’ or complicated mental gymnastics?
Here’s a little trick I found to quickly import a GA4 drum map and make it so the channel and output for each individual kit piece can be edited.
- In the instrument or midi track inspector that you wish to map click the drum map area in the track inspector.
Choose “Create Drum Map from instrument”.
Click that area again and choose “Drum Map Setup”.
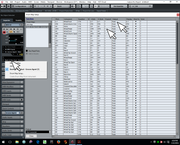
You’ll get a big Drum Map Editor…
-
Unfortunately this imported map will not let you change the outgoing channels or ports as is, but we can fix that with a text editor. A bit of a pain, but it’s much easier and quicker than going through and changing everything by hand on a ‘fresh new map’ where everything defaults to ‘channel 10’, ‘track output’.
-
So…click the function tab in the top left of the Drum Map editor and save a copy of your imported map by clicking on ‘Functions’ in the top left hand corner of the Drum Map editor and choosing “save”.
Use a name and location you can remember (By default it’ll probably offer to save it in the directory of your currently opened project).
-
Switch to the GM Map (which can be edited) and save a copy of that somewhere (just like you did in step 3 with the imported map).
-
Open the GM Map.drm, and your imported map files in a text editor.
Scroll to the very bottom of both files…
Copy this bit of XML relative to “OutputDevices” and “init name” out of the GM Map.
   <list name="OutputDevices" type="list">
      <item>
         <string name="DeviceName" value="Default Device"/>
         <string name="PortName" value="Default Port"/>
      </item>
   </list>
   <int name="Flags" value="0"/>
- Highlight this bit of code in your imported drum map and replace it with the code above.
<int name="Flags" value="1"/>
-
Save your imported drm file in utf-8 format.
It’s important to make sure you’ve your text editor to save it in plain utf-8 format, and that the file is named with the .drm extension! -
Back in the CuBase Drum Map editor: Click on your imported map in the list so it highlights, click ‘Functions’ again, and remove the map.
-
Click “Functions” again, and load your altered copy of the imported map.
At this point, you should be able to edit the channels and ports/outputs of the map.
You might need to click the Drum Map area in the track inspector and tell it about this new map so it can use it.
Steinberg, Can we have a way to unlock imported maps in the future without having to hack it this way?