I would like to apply EQ/FX to a MIDI track for an EastWest Symphonic Orchestra double bass patch (instrument). The double basses are one of a few patches on an instance of EastWest’s Play (VST rack instrument). I seem to only get the option of applying MIDI FX when I click on the Insert Rack for the above track. But I can access the audio FX (EQ, reverb, compression, etc.) for that entire instance of Play in the Inspector.
Do I have to treat each instance of a VST rack instrument as a group track and apply the same EQ/FX to all the instruments on it (accessed on different MIDI channels)? Is there a way to apply Audio EQ/FX to only one instrument (patch) on the VST rack instrument (say the basses)?
BTW, can the forum moderator ask the Steinberg engineers to use a different term for an instance of VST rack instruments, say “sample player” so it is not confused with the actual instruments (patches) that are loaded on that instance of the rack instrument?
All help is appreciated.
Hi nad welcome,
You cannot apply EQ/FX to MIDI Tracks, you have to apply them to the Instrument Return Channel. You can use either one global Out from the virtual Instrument, or you can use several outs, and route different MIDI Channels to the different virtual outs (do so in the virtual Instrument). Those virtual outs are handled as an Instrument Return Channels, where you can put your Insert effects.
To enable multiple-outs, click to the [-> button in the Inspector of the Project window, when the track name (very 1st) tab is open (it’s close to the “Open Instrument Editor” button).
Thank you for your prompt reply Martin! So, I have an instance of EastWest Play rack VST instrument. This VST rack instrument contains different patches (e.g. violins, trumpets, etc.) I would like to apply individual EQ/FX to each above patch.
I already have assigned unique MIDI channels to each patch inside Play. Also, I have given each of the above instrument its own MIDI track with a MIDI channel that corresponds to its channel inside Play. I have already used the [-> button to route the output of each MIDI track to the instance of Play it belongs to. But this is where I lose you! Can you give me step by step instructions for an example patch? Thanks!
Hi,
First of all, you have to route the signal to different virtual Outputs in the Play. Select every single MIDI Channel in the Play, and change the Out from Main Out to StOut1; StOut2, etc.
Right-click to the header of the plug-in and enable multiple outs.
In the VST Instruments folder, you should see the Return Channels, now (also in the MixConsole). Can you see them? Here you can apply your Insert effects.
Martin, you’re the man! Here’s what I did:
- Went to Devices > VST Instruments
- Click on [-> button at the UR corner of the target Play instance
- Selected All Outputs (at the top)
- Then I click the edit instrument for the target Play instance in the inspector
- Inside target Play, I clicked the Mixer button in the UL corner of the window
- Then I changed the outputs for the target patch from “Main L/R” to “3 & 4”.
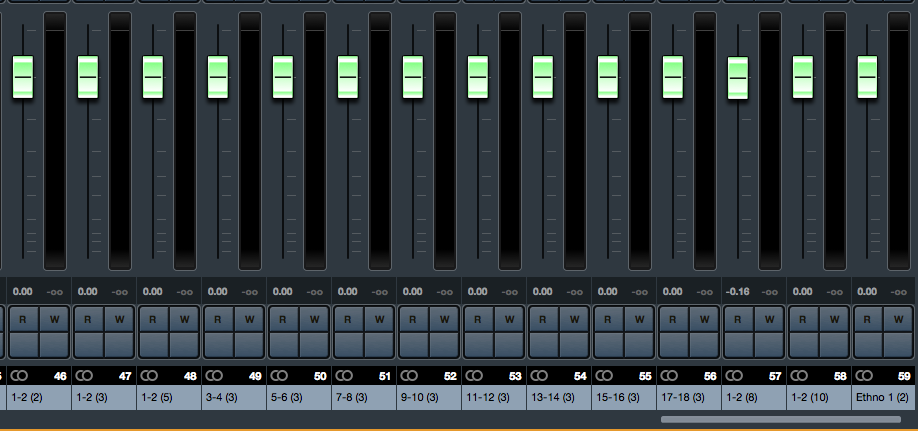
- Then in MixConsole I noticed a bunch of new channels labeled 1-2 (2), 1-2 (3), etc. with green faders.
- I located the channel labeled 3-4 (3) and was able to successfully insert FX into it!
Final couple questions:
- What do the numbers in parentheses in front of the Return Channel names represent?
- Can I only change the output only for the patches I wish to add FX to and leave the rest at Main L/R?
- Does this procedure work with all rack VST instruments (e.g. HALion, etc.)?
Thanks again Martin! Here’s the screenshot. Notice the Return Channels names.
Oh sorry, I have no idea.
Thanks again for everything martin! I will name my first child after you! 
Hi,
I am in a similar situation but with Groove Agent SE 5.
I have a GA rack instrument, activated some Output and created different midi tracks for each drum kit routed to one instance of Groove Agent SE 5.
I also routed my drum kit in different Out put (for ex; Master for kick, Out 2 for snare, Out 3 for Hi Hat, etc…).
How can I apply the EQ/FX individually to Kick, Snare, Hi Hat, etc…?
I am using Cubase PRO 10.5 and Groove Agent SE 5.
Thank you
