I will show here with pictures how to midimap the Start/Stop button in the transport panel, so it will be possible to use it with the foot pedal in X Touch One.
- First right-click on the Play button or Start (Transport) as it’s called in Cubase and click on “Pick for MIDI Remote Mapping: Start”.
- Click on the pedal

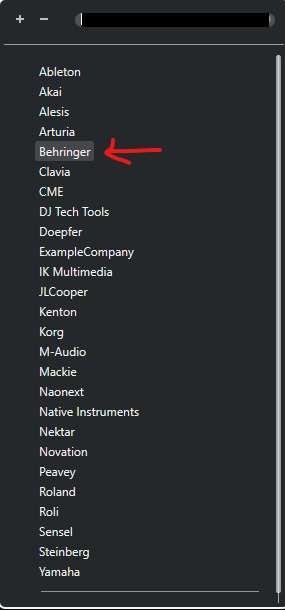
- A page comes up where you need to add a MIDI Controller Surface. You select the vendor Behringer in the drop down list. Choose the model (you can write whatever you want. You also need to write something in the field for the script creator, which is you. I wrote my initials. Choose the Input Port “X-Touch One” and leave the Output Port empty. Then press "Create MIDI Controller Surface.
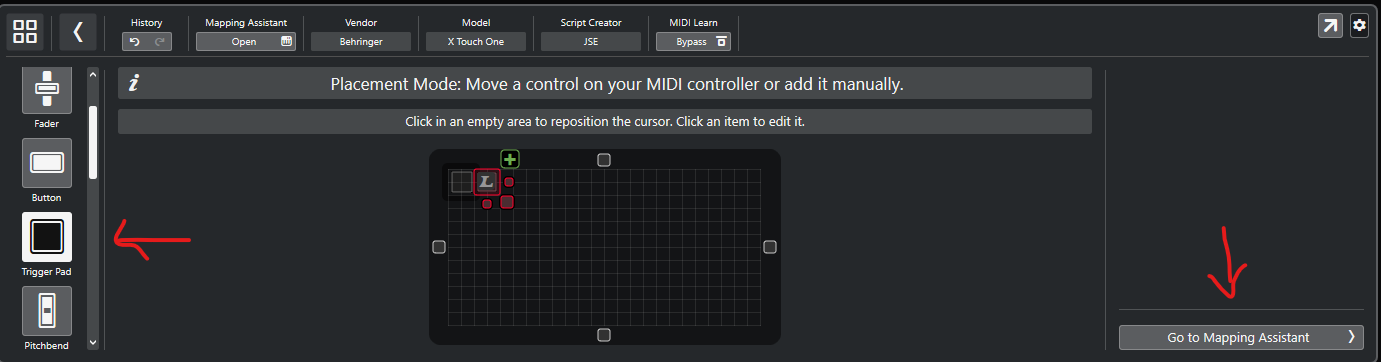
- In the MIDI Controller Surface choose a Trigger Pad (to the left) and then click on the pedal once and then click on “Go to Mapping Assistant”.
- A new window will pop up.
- Click on the + sign and enter a page name. I choose Start/Stop as a name, so it will be easy to remember what this function is for. Especially since you can create many MIDI mappings.
- Go to your transport panel and again right click on the Start button and click on “Pick for MIDI Remote Mapping: Start”.

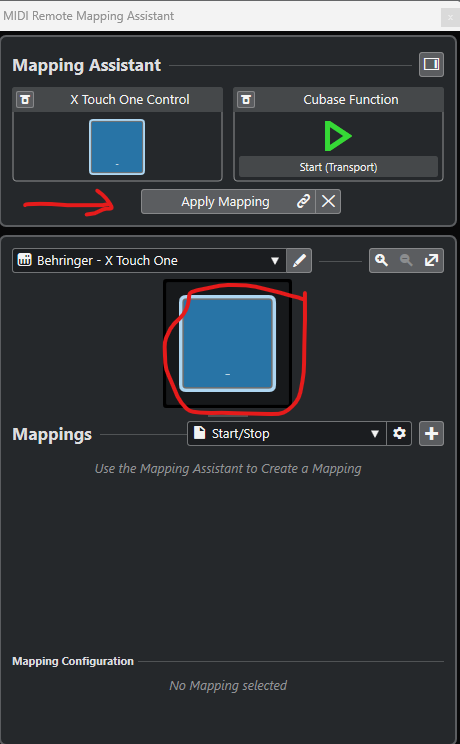
- Now in the top right corner you will see a green button and underneath it will say
Start (Transport). Now press your pedal, and you will see that the big button in the middle turns blue and you can also click on “Apply Mapping”.
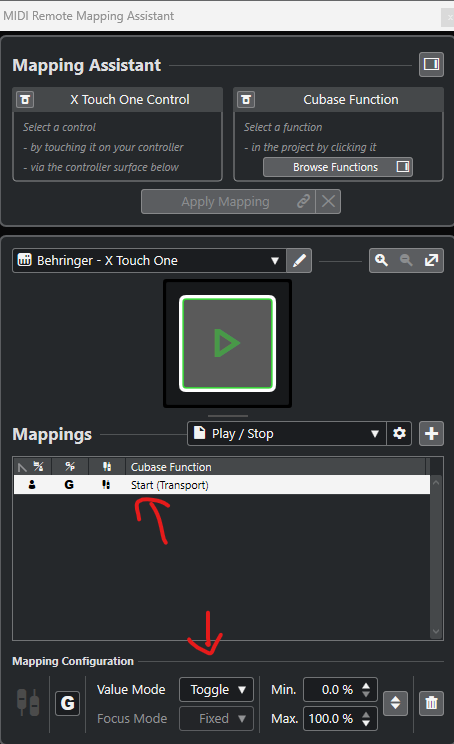
- After that you clicked on “Apply Mapping” you will see how the big button in the middle turned into a green Start button.
- You need to do one more thing. Click in the Mappings field where it says “Start (Transport)”. A new window appear. Make sure it’s set to “Toggle” and that the Min value is 0% and Max value 100%.
- When you close the MIDI Remote Mapping Assistant window, you should be able to toggle Start and Stop with the pedal (via X Touch One).


Just choose the “Transport record” button instead if that’s what you want to use the pedal for. Or you can create another midimapping for that instead.