This thread is intended to convey my approach to recording as of the last song I released (Grad Student Blues). I’m constantly tweaking it, but this is relatively stable. All prices are in USD$. All screenshots are from the Grad Student Blues Cubase project.
Equipment List
Mackie board (1604VLZ).
M-Audio 2496 PCI board - I’ve also done this with a Tascam US-144 USB-based interface.
Mindprint EnVoice MKII tube preamp / compressor with 3 band EQ circuits.
M-Audio Axiom 25 MIDI controller - rarely used now but used more often than the synths I have that were doubling as MIDI controllers.
MOTU MIDI Express XT USB-based patch bay.
For mixing and mix-verification, I’ll use my Yamaha SP-3’s (mixing), my Grado SR-80 cans, and my iPod Touch.
Signal Path
For audio signals: EnVoice > 2496 > Cubase
For MIDI signals: Axiom 25 > MOTO > Cubase
General Notes
Busses 1/2 (L/R) on the board are used for signals to be recorded and 3/4 are used for playback while recording, i.e. 1/2 get routed to the audio interface but all 4 busses get sent to the main L/R mix that is then routed to the monitors.
Signal processing plug-ins are all stock (for Cubase 4.5.2) except for 2 from Blue Cat Audio, 2 from Kuassa, and Celemony’s Melodyne:
Blue Cat: the Frequency Analyst (part of the Freeware Bundle) for checking the frequency makeup of incoming audio signals, and Peak Meter Pro ($59) for the master bus to ensure that the signal conforms to Bob Katz’ K-14 specification.
Kuassa: Amplifikation Creme ($34) and Amplifikation One ($49) are what I use for overdrive / distortion. If you’re using C6, you may be able to use the built-in amp sims but I know nothing about them.
Melodyne Editor: $349, used for pitch correction and timing correction. If you’re using C6, you may be able to use Variaudio and Elastique but I know nothing about them.
I also use Magneto, which came with Cubase 4.5.2 (the version I have) but wasn’t installed by default; you have to find it on the CD in the Extras folder (or something like that).
I do use various VSTi plug-ins. Most frequently these are limited to Battery and Kontakt, but I have been known to use others that are either freeware, shareware or even demo versions.
Process
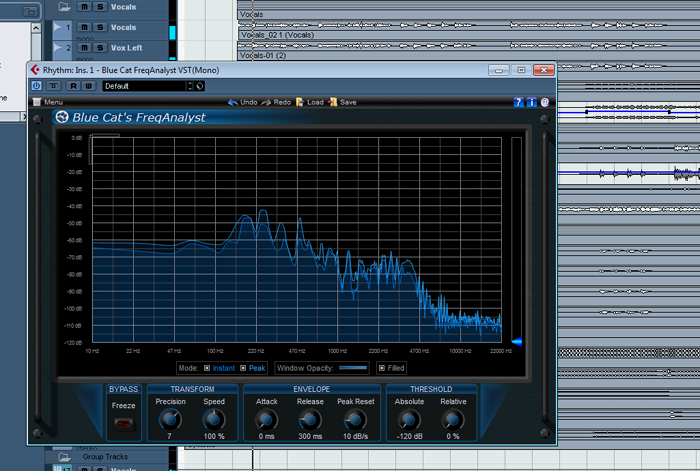
I start by checking the quality of the signal, especially the EQ. Checking the EQ of the incoming signal is key to me, and I’ll use the Frequency Analyst VST to tweak the EnVoice’s 3 EQ channels. When using it, I’ll change the Peak Reset knob to -10 dBs / second so that I’m not looking at absolute peaks and get distracted by it. You can see how I try to ensure that the guitar and bass have a “good” (very subjective) frequency distribution here:
(Guitar)
(Bass)
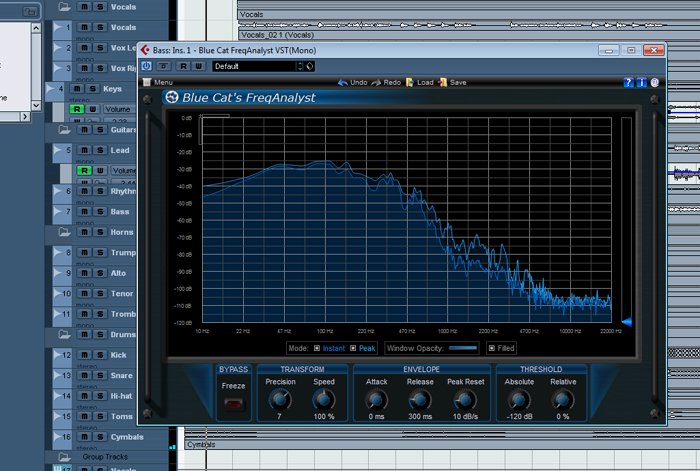
Again, “good” is subjective but this works for me.
Since I’m using Kuassa on the guitar signal (post tracking) I do like to get my signal to 70%, which I didn’t do here. Kuassa will properly process it regardless, but once it drops below a certain threshold the distortion dies quickly so having it at 70% gives me an effect similar to compression, i.e. the signal lasts longer than it probably would using a real amp.
For MIDI authoring (not recording), especially non-synthetic instruments (horns) I do use the Expression controller (CC 11) to ensure a more realistic sound. For example, for sounds that should be loud and “push” the instrument, CC 11 is pushed way up. But for sforzando expressions, you’ll see a dip in CC 11 as below.
(This is from 1:13 of the song)

When you author the MIDI stuff correctly, recording is a breeze. I mixdown to Audio with the Import into Project > Audio Track box selected.
That’s pretty much it for the recording aspect. Mixing continues below.
Mixing
Mixing for me is an exercise in de-duplication, i.e. I’ll combine as much of the same stuff by routing signals to group channels (when it makes sense). For example, for all audio tracks (save for bass-heavy tracks [including synths]…drums also get special treatment; see below) I’ll route them to a group channel specifically used for HPF.

Any bass-heavy instruments go directly to the master bus.
Drums
Drums are a love-hate relationship for me. I don’t have a quick way to do this so when I think I can get away with it, I’ll leave them alone and let Battery get rendered for the final mixdown. When this is insufficient, though, I’ll mix the drum tracks down using the MIDI insert Transformer.
![]()
This will delete every MIDI note except for the ones that I want (belonging to the class of drums I am mixing down). After I set this up, I’ll mixdown / import as track so that I have 5 tracks (typically) for drums comprising of the following: kick (mono), snare (mono), hi-hat (mono), toms (stereo) and cymbals (stereo). The snare, hi-hat, and cymbal tracks get routed to their own group channel and the same HPF applied. The output of that group channel gets sent to a master Drums group channel (which is also the target of the kick and toms), which gets routed to the master bus.
Having a separate “master group” channel for the drums allows me to change the overall loudness in case subsequent tracking buries the drums in the mix. Also, since I have 5 individual tracks I can also influence the EQ using the EQ settings (or EQ-10 / EQ-30) or via inserts (e.g. Tone Booster).
The master bus is typically where I’ll apply the Magneto plug in to “warm up” the sound (though purists will justifiably argue that it’s not really warming it up); apply any final scooping of the EQ (usually around 500 Hz, using EQ-30); and then apply reverb. At the very end of the insert chain, I’ll use Peak Meter Pro to check the RMS volume levels.

Note that this is simply using the K-14 preset (upper right), and nothing else is changed. Also note - and this is very important - that you must use this on insert slots 7 or 8. These are post-fader (meaning that volume automation also affects it) slots, which means that the plug-in gets the volume the listener hears and not the internal bus volume.
I’m only looking at the inner two horizontal meters too (labeled RMS on the left) to ensure that they stay somewhere around +0.
Final Notes
That’s it! This really has become more of a science for me, letting me focus more on the art of playing. Also, because this seems to work so well, I don’t have to worry so much about the sound during tracking because I know that it’ll come out well enough. Years ago, I would fiddle with inserts, etc. to do post-tracking shaping of the sound, and that always led to horrendous results.
Finally, it should be noted that I record at 44.1 / 24-bit. I saved this until the end because I know people will think that higher settings are needed, but I’ve never had an issue with sound quality.