I have a Montage with 24 CD clips/CD Markers. I want to render all 24 as separate MP3s. I want each to be named with a formula like so:
01-CD Track Name #1
02-CD Track Name #2
03-CD Track Name #3
…etc…
I tried changing the formula to use the Track Index followed by Clip Name. But the generated MP3s only show the Clip Name.
What am I doing wrong?
When I try using the Counter variable, I get all the MP3s with a Counter prefix BUT they are presented in alphabetical (file name) order. NOT what I want.
What I -want- is to preserve the order they appear on the CD.
I hope that makes sense. Now… how do I do this?
OR… I thought there was a Tracknumber variable one could encode directly onto an MP3 but I don’t see it in the Wavelab list of variables. Am I missing something?
Did you try using the ‘Numeric Prefix’ preset (in the Scheme field under the Render ribbon)? To get exactly what you want change the Digit number to 2 in the Naming Scheme window.
I think you might want to consider removing the -CD from your file naming scheme. That might be triggering some computer file systems to put the songs in alphabetical order.
I’ll attach a screen shot of how I do it so that with apps and file systems that don’t read metadata, the files always end up in the same order. I just do:
01 Track Title
02 Track Title
03 Track Title
The format (WAV/mp3 etc.) is denoted by the folder name so the file names can be simpler. I do this whether it’s WAV or mp3 files. The two digits are important.
Also, in the montage metadata tab you can tell WaveLab to populate the track number/track total in the ID3 metadata tab so that apps which can read ID3 metadata will know the correct track order.
Here is the formula I’m using. I already had my Metadata set up to match -your- screen shot.
I do NOT get this. Even when I use the ‘Counter’ and ‘Name’ variables, the files don’t appear in any order I can figure out. Why don’t they simply generate in the order of the CD?
It’s hard to say what’s going wrong without more info and context but I hope this helps:
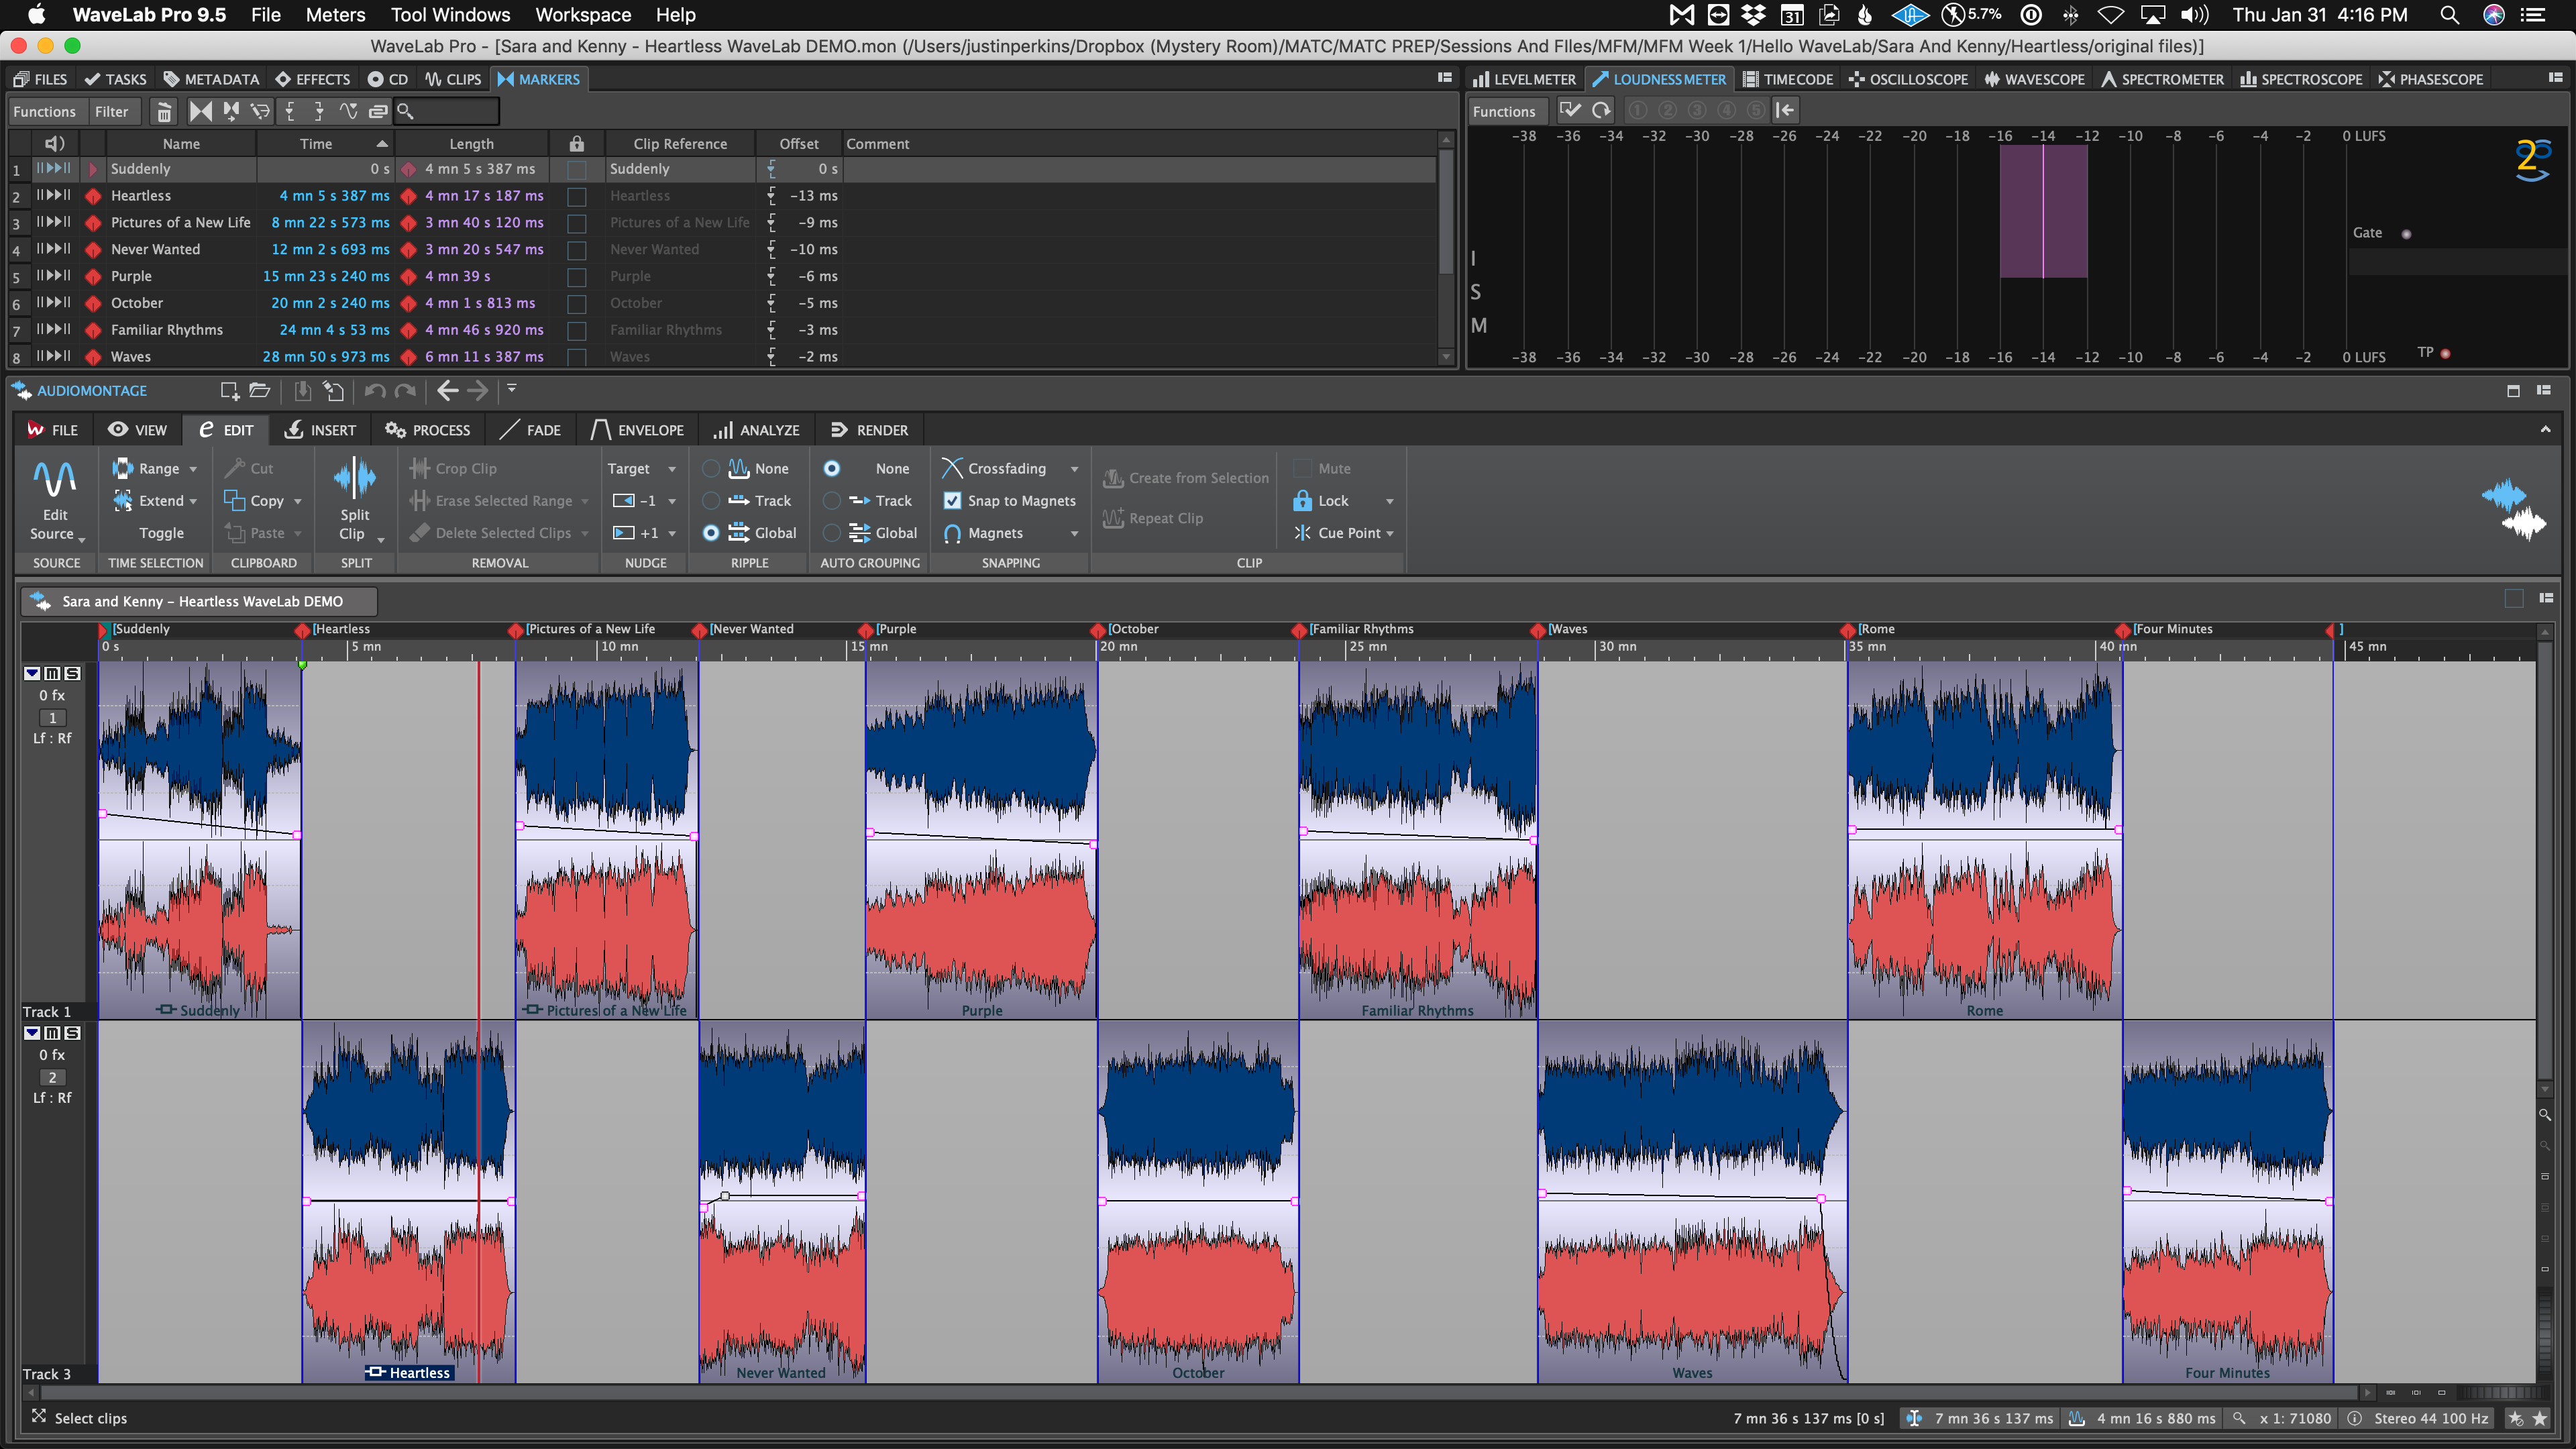
Here’s an overview of my montage just to get an idea:
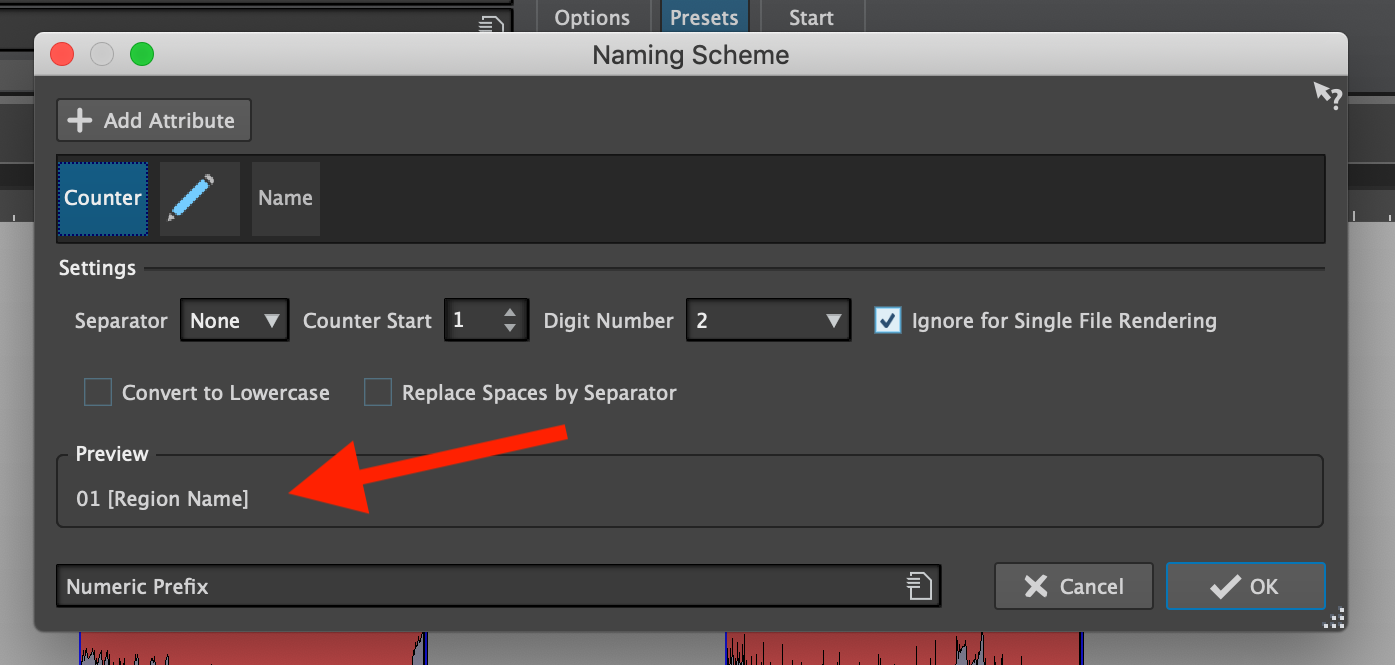
Here’s an image of my Naming Scheme:
Here’s my Numeric Prefix Naming Scheme Preset:
Or better yet:
Here is my full Render Settings Preset for 320kbps mp3:
Here is my full Render Settings Preset for 16-bit WAV:
Hopefully one of these things helps guide you in the right direction.
You can put my presets onto your machine by first going to your machine and choosing “Organize Presets” in the preset menu. This will show you where WaveLab is looking for the presets for a given command. Put mine in the correct location(s) and you should be able to use them.
Hi suntower,
Just wondering… what order do your file names actually appear in? what does your list of filenames look like and where are you viewing them??
See my above post but in Suntower’s Naming Scheme screen shot, the preview in the bottom left of the image shows that it’s only going to use the Clip Name and nothing more.
I should have provided enough info to show how to get the track number (in two digit form), a space, and then the Region Name to be the rendered file name.
I personally keep the clips named as their natural name and do the proper naming with the CD Track Splice Markers which can get pushed to CD-Text in one click, and pushed to metadata in 0 clicks assuming you have the right Metadata preset loaded up with your new montage template.
Then I use Render Presets for rendering various things like 16-bit WAV, 24-bit WAV, mp3, AAC, vinyl sides etc.
What I’m -trying- to do… SORRY I GET SOOOOOO effing FRUSTRATED WHEN THINGS THAT SHOULD BE A DODDLE… cleansing breath
I have a CD with 24 tracks. I select all 24 clips and hit Render. It gives me the option to render all 24 clips as separate MP3s–using the naming formula. Except that the naming formula doesn’t seem to be working.
ANOTHER ISSUE: The generated MP3s don’t seem to be getting the proper Track # even though I have it set in the ID V2 tags. (I may have that wrong… I’m not at the DAW but it’s set correctly there.)
I’ve tried dozens of variations on the naming formulae and NONE of the various Auto Variables seem to work. The ONLY variables that work are the [Counter] and [Clip Name] which would be -fine- if the effing THING would simply generate in the order of my Montage!
Attached is a screenshot of the MP3s generated by WL. Again, this is the order in which WL generated them, which neither matches their order in the Montage or alphabetically. It makes -no- sense.
Well, it looks like you are sorting the files by the date/time created so that’s why they are in that order. If you clicked the name tab they’d probably be in alphabetical order (or reverse alphabetical).
But what doesn’t make sense is why the rendered files are not getting the naming scheme.
Without seeing a recorded video of how you are rendering the files and with what settings, I can’t really help any more.
There are apps like Team Viewer that will allow you to share your screen in real-time with other people and most of them have support for audio so you can talk to the other person.
See attachment. The ‘trick’, such as it is, is to select “All Regions” in the Source block to the left and then “CD Tracks” underneath -that-. When one does that, all sorts of magical things happen, including:
It selects all the clips.
2, The MP3 files generate in the CD Track order as expected.
All the Auto Variables start working ('ie. getting applied to each generated MP3)
What scares me is that unless I write this down and pin it to my monitor (along with 56 other notes) I’ll never remember it when I next need it 3 months from now.)
@PG: You know I have love for you, but this is one task that needs some sort of UX upgrade. Justin was trying his guts out to help me but it shouldn’t be this hard to do what I was trying to do. Cheers.
I will. I saw the word ‘Regions’ in one of your screen shots. I -do- get the value of Presets. But still, I want WL to be as ‘user-friendly’ as possible. Tasks like this should be a direct line from point a to point b. MOSTLY v9 gets it right.
Anyhoo… THANK YOU for all your help. Frankly, I would’ve given up if not for your persistence. AND…
@PG: I tend to always give WL the benefit of the doubt. I have faith in the program, which means: I always assume that it -can- do what I want it to do and it’s just a matter of finding ‘the trick’. I rarely find things it cannot do anymore—especially since the new Spectrum Editor. Cheers.
The ONLY improvements, IMO are usability. I still find it too hard to remember obvious things like what is called ‘Follow’ in Cubase or how to remove a fade. Again, I’m so used to doing them in Cubase that I have to look them up in WL.
SUGGESTION: Make a Cubase/WL help topic ie. a list: THIS key command in Cubase is THAT key command in Wavelab.
No problem. If we would have done the screen share that was going to be the first thing I checked was your Render Source setting. I had a feeling that might be it and I should have mentioned it sooner.
Anyway, I’m glad you found it now.
The rendering output options are a big part of why I use WaveLab daily for finalizing masters. So great.