I’m fairly new to recording and I’m wondering what is a good method for setting up preliminary volume/gain levels? I realize that it’s going to vary a bit from person to person and from setup to setup, but are there some golden rules to follow? I want to ensure that nothing is clipped, but I also don’t want things to be too quiet when it gets mixed and mastered.
My UR824 interface has a gain knob for each input channel. I’m using Cubase 6, and the program has a virtual mixer in which it shows the levels for each input, as well as a master volume control. I’ve heard some people recommend that I set the input level in the program so that the sound peaks around -12 dbFS. I also watched a tutorial that recommended I set the input level between -3 and -6 dbFS. There’s a light that glows red on each input on the interface (I’m assuming that means the signal is clipping). If I make sure there’s no red light, and I have the level around -6 dbFS in the program, am I good to go?
ps: Check google for setting recording levels
RSager I tend to record Audio High Frequency things
Cymbles–Tambourines - etc. at a lower level and
most everything else at moderate levels.
Always use your Ears and Eyes and maybe test recordings.
In Cubase 7 theres a “BRICKWALL LIMITER” that I’ve been using
on my INPUT Channels. Works great.
A person could write a book on this subject
as you found out everyone likes levels different. the importsnt thing is to not clip the converters. And software limiters in input channels (which btw. you don’ t have anyway in AI 6) won’ t help prevnting that.
Well, I did some test recordings of me playing my drum set, and everything sounded fine. I have the gain knobs on each input on the UR824 at about half; there’s a light on each input that glows red if the input level is too high. I’m assuming this is the interface’s way of telling me that the signal is clipping at the ADC. In the program, I have the input level set at -6 db. Nothing sounds clipped. I just am wondering if there is anything else I should be taking into consideration (as far as setting levels) before I blaze ahead and start recording bass, guitar, keyboards, and vocals over the drums.
I’ve read some threads on this site and gearslutz.com where people have mentioned that I need to make sure that the signal doesn’t clip at the preamp level or at the analog-digital converter. The thing is, my interface has the preamps and the ADC all in one box. The only way I can affect that is with the afforementioned gain knobs on my UR824. I’ve heard some say that I need to make sure the signal peaks around -18dbFS, and I’ve heard others say that that is too quiet and I’ll need to later make the recording louder in the mastering phase, which may add unwanted hiss and noise to the recording.
RSager: Well as “Thinkingcap” said – you found out everyone likes levels different.
I started recording in the days of Analog Tape and Reel to Reel Tape machines —
and I would record at high levels “HOT” back then to over come Hiss.
But IMO with Digital a person can record a bit lower – but I too keep an
eye and ear on those peak meters.
Jack
PS: Yea I tend to raise levels a bit to - in the Mastering phase
and use Reference CD’S to compare Level, EQ, etc.
with Wavelab 7.
Okay, so if I’m not getting any red lights on the interface, and my input level (in Cubase) is between -3 and -6 db, I’m good to go? Anything else is just personal preference?
That sounds pretty reasonable. No need to have your input signal as hot as possible. I’ve been shooting for about -5 or so for my peak input levels lately for recording guitar/bass directly.
The main thing is to not have the signal clipping at the input of your interface.
If your interface is just the input gain type, the main metering is done in the Input stage of Cubase.
Leave the Cubase input gains at unity, do not put limiters or compressors on any input channels. Use Cubase input meters as your level reference.
Then it’s just a matter of setting the interfaces input gain untill you achieve the desired level as indicated on the Cubase Input metering.
I tend to go for lower levels these days, -12 to -9 dBFS but really as long as it’s not clipping it’ll be fine.
As you get better, it’s maybe good practice to set the levels of tracks so that the track sits in the rough mix without adjusting the Mix fader level. So really, there is no such thing (in a daw) as a correct level setting.
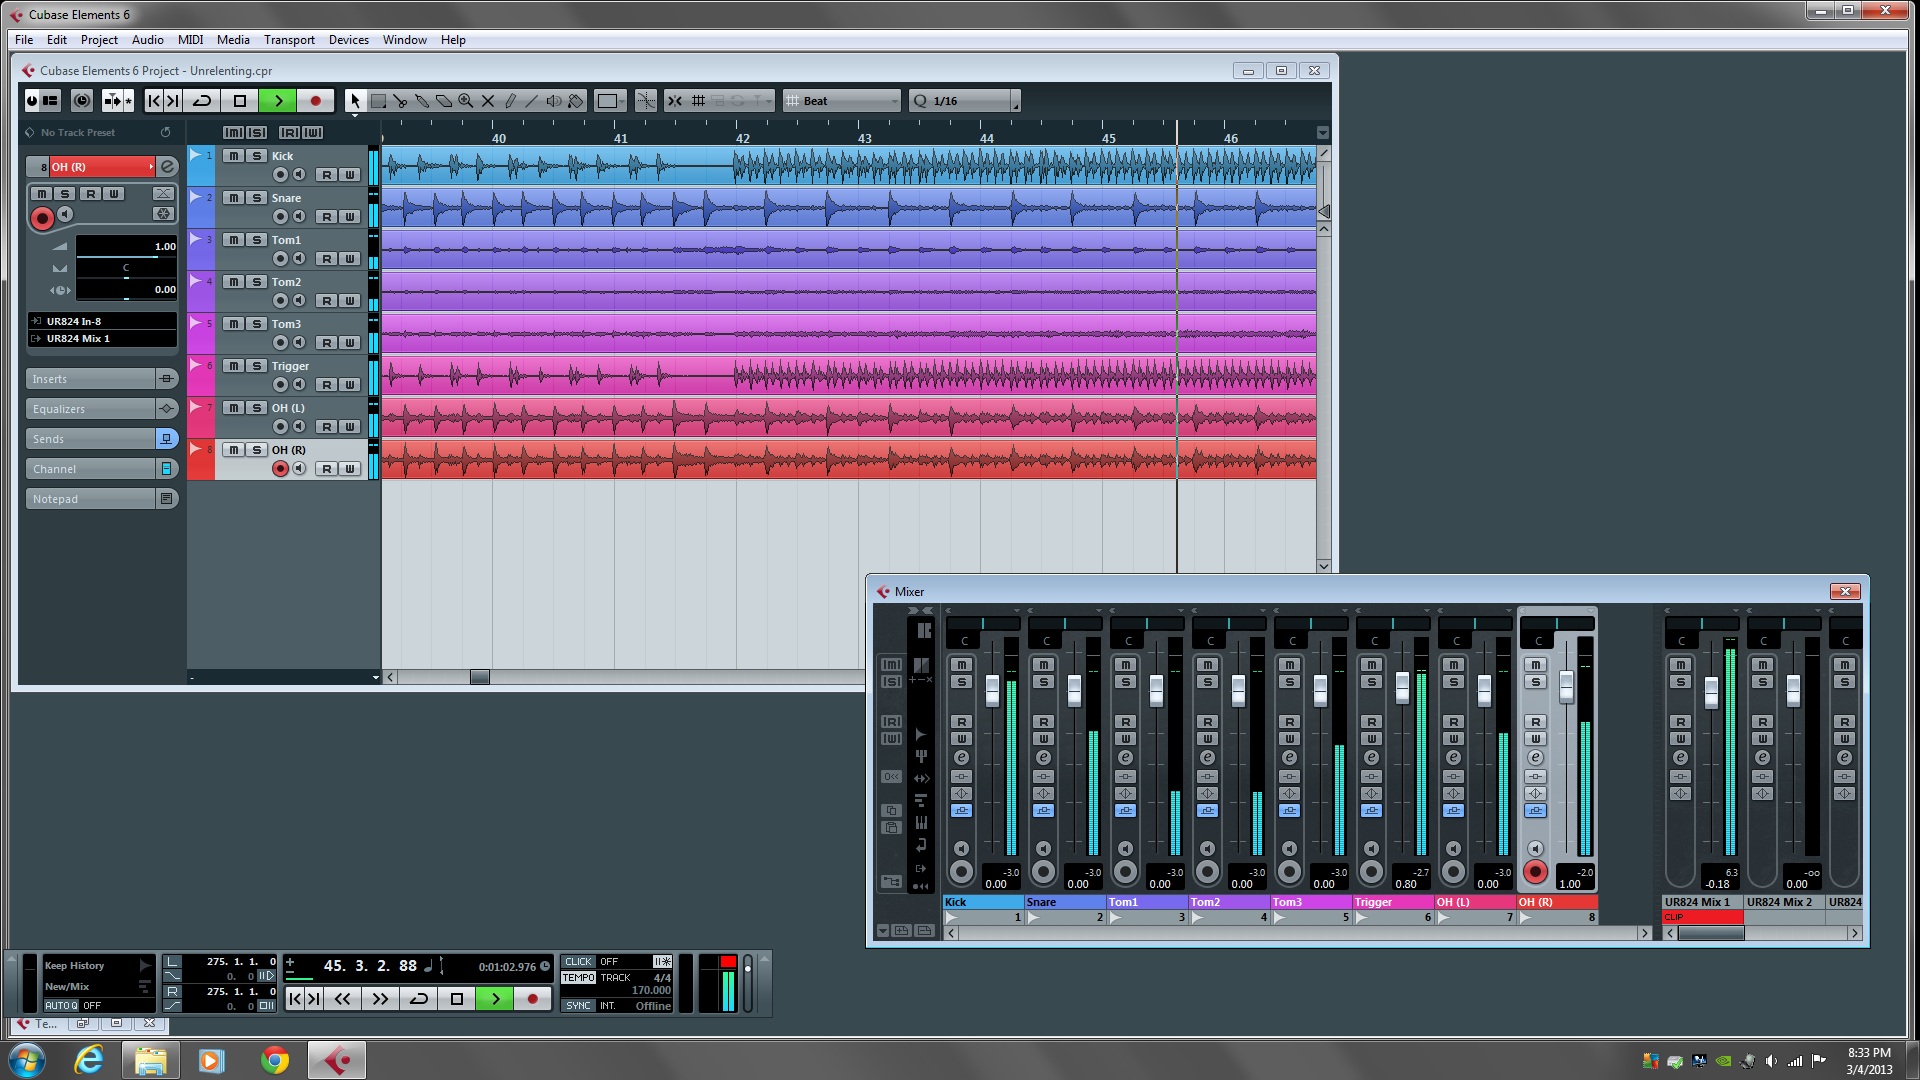
Okay, so I’ve started laying down drum tracks for my band’s demo. If you look at the picture that I’ve attached, you can see the relative levels in the mix as well as the output level. Nothing sounds distorted at all, everything sounds pretty clear, but when I listen to the full mix, the red clipping indicator appears beneath the output slider. The guy who is helping me record set the levels and it sounded pretty good in his studio. I’m listening back to it over headphones, and everything still sounds pretty clear, though I think the toms are slightly clipped when I listen to them soloed.
One thing that I noticed is that if I solo any track, the red clipping indicator never comes on. If I listen to the full mix, the clipping indicator goes on whenever I hit any hard accent, like a strong bass drum or snare hit.
So it definitely seems like I need to lower my input levels. However, I don’t understand why the clipping light only goes on in the DAW when I listen to the full mix, and not when I solo out a certain channel, even one of the tom mics.
Also, I notice that there are two dbFS values assigned to each channel. One value changes when I move the sliders in Cubase; it is set at 0.00 at the moment. The other value is above the first one and in a slightly smaller font. These all say -3.0 or something close to it, although sometimes they seem to change in value at random times. Any idea what’s going on there?
One is the Value that the fader is set to relative to 0dBFS. It will change when you move a fader, whether a signal is present or not.
The other is the value of the peak signal for that channel, it is a measurement of the largest signal level.
The Master Stereo Out Channel is clipping (signal is beyond 0dBFS). This is due to the “summing” of several channels (the drums) The more signals you combine the bigger the result will become.
To prevent this from happening you can do one of three things!
Turn down all the drum channels, turn down the master fader or both.
Okay…so do you think I should proceed with the recording with the levels where they are? None of the individual tracks are clipping (I think the toms are fine, actually), everything sounds good to my ears.
EDIT: I just had a scary thought. If the output level is slightly clipping now when it sums all 8 drum channels, it’s only going to get worse once we layer three guitar tracks, a bass track, and two vocal tracks. So should I start over with the input gain at a lower level for each channel at the interface?
I know that I can get rid of the clipping by lowering the slider on the output channel. I just want to make sure when I create a stereo audio file of each song and I send it somewhere to be mastered, the songs won’t be clipped but they won’t be super quiet either.
Okay, thanks. So basically, I can just keep recording, but before I export the Cubase file to a stereo audio file to be mastered, I have to make sure I adjust the faders so that there’s no clipping in the output channel, correct?