What are you trying to accomplish? Probably easier to set it up by hand and then save them as a Track Preset.
Trying to do it using Macros & PLE Presets (fyi, not LE) will get cumbersome because of dialog boxes.
What are you trying to accomplish? Probably easier to set it up by hand and then save them as a Track Preset.
Trying to do it using Macros & PLE Presets (fyi, not LE) will get cumbersome because of dialog boxes.
Hi,
I would also go for the track preset.
Or if you want it as a start of your project, you can save it as a template project.
If you want to add it to an existing project already, your can make a project like this, save it and then import from project to your origin project.
Here’s a macro that saves me tons of time editing.
make sure your track and event is selected
RANGE select the event you wish to split
Macro-
Edit-Split Range
Transport - Locate Selection Start
Tool - Object Selection Tool
Edit - Select events under cursor
Audio -crossfade
Transport - Locate Previous event
Transport - Locate Previous event (yes twice… don’t ask)
Edit - Select events under cursor
Edit - Delete
Transport - Locate selection start
Tool - Range Selection tool
Great for isolating events like Tom hits, Vocal lines, etc.
Use Range Tool to select
Assign a Hotkey and away you go

ake sure the ‘Use Mouse Wheel for Event volume and Fades’ option is activated in Preferences. Editing/Audio page.
[ALT]+Click on an audio event to cut it around the area you want to change, then hover the mouse over it and mouse wheel up for louder (up to 24db) or down for softer. Will also work for multiple selections or entire Audio events. Won’t work for an Audio Part unless you dissolve part first [CTL]+ right[option] click to open context menu and choose Audio/Dissolve Part.
[CTL]+M/Wheel near front of event to adjust fade in or near rear for fade out.
Hi,
In the post-production, the sound engineers do this tasks 100 times per day. Their workflow is different:
Then select the Audio Event and hit the relevant Key Command. If it’s not enough and you need to increase by +6dB, hit the A Key Command twice.
This is the fastest workflow, I have ever seen.
They use the very same approach to apply EQ settings (gain/reduce some frequencies) and other tasks.
Hi guys. I’m looking find the quickest way to do the following MIDI note edits. Would appreciate suggestions and pointers. Haven’t been able to figure it out.
Staggering notes to form a “strum”:
Let’s say I have a C maj chord where C, E and G have the same note start time. Let’s say my quantize is 1/8. I would like to shift E’s note start position by 1/8 and G’s by 1/4. I came across a video describing this functionality in FL studio (How To Make Guitar Strums - YouTube). I’m sure there must be a way to do it in Cubase, just that I don’t know where to start.
Hi-Hats:
Say I have a series of MIDI 1/4 notes and I want to cut them all in half so that they become a series of 1/8 notes. What’s the quickest way to do it? When using the slice tool, I am only able to edit one note at a time.
Hi,
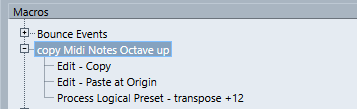
Make a Macro of these two Logical Editor presets:
1: Shift the 2nd note in the chord (from the bottom):
Filter Target
( Type is | Equal | Note | And
Context Variable | Equal | note Number in Chord (lowest = 0) | 1 )

Action Target
Position | Add | 0.0.1.0 PPQ

Function
Transform
2: Shift the 3rd note in the chord (from the bottom):
Filter Target
( Type is | Equal | Note | And
Context Variable | Equal | note Number in Chord (lowest = 0) | 2 )

Action Target
Position | Add | 0.0.2.0 PPQ

Function
Transform
Btw, there is the “strumming tool” when you select the Trim tool and hold down Alt modifier. You would need to do it manually for every single chord, but at the other hand, you can do up/down strumming.
Of course, you can prepare your Logical Editor preset for up and down strumming too.
I would go this way:
=> The MIDI Note will be splitter repeatedly by 1/8.
Another way to get the same:
=> All selected MIDI Notes will by copied 1/8 to the right.
Oh wow. Thank you so much. Will check these out!
Both of these worked like a charm. Thank you!
Martin, you are a GENIUS !
Cubase iC Pro lets you set up pages of labeled buttons that perform Cubase actions — like macros, but you don’t have to remember keystrokes.
Here is something I find useful in comping tracks without using lanes and the comp tool:
Comp Audio Track Instead of Lanes
I would like show you how use macros to Comp a track instead of using the comp tool and lanes. I normally record using lanes first the move to an individual comp track using macros.
Before you start, check your preferences. This will allow you to listen to other tracks while you are compiling the comp track. I like to put the backing tracks in the upper or lower divided section of the mix window.
Preferences:
Editing - Use Up/Down Navigation to Select Tracks Only (Check)
Editing
Project & MixConsole uncheck
Enable Record on Selected Audio Track (Uncheck)
Enable Solo on Selected Track (Uncheck)
Here are the Commands and Macros I use to do this:
Commands:
Locators to Selection
Zoom to Locators
Macros:
Play-Down
Edit - Mute
Navigate - Down
Edit - Solo
Edit - Select Events Under Cursor
Play-Up
Edit - Mute
Navigate - Up
Edit - Solo
Edit - Select Events Under Cursor
Navigate-Up-10-Move
Project - Select Track: Prev
Project - Select Track: Prev
Project - Select Track: Prev
Project - Select Track: Prev
Project - Select Track: Prev
Project - Select Track: Prev
Project - Select Track: Prev
Project - Select Track: Prev
Project - Select Track: Prev
Project - Select Track: Prev
Edit - Move to Selected Track
Navigate-Down-10
Project - Select Track: Next
Project - Select Track: Next
Project - Select Track: Next
Project - Select Track: Next
Project - Select Track: Next
Project - Select Track: Next
Project - Select Track: Next
Project - Select Track: Next
Project - Select Track: Next
Project - Select Track: Next
Locators-to-Select-Cursor
Transport - Locators to Selection
Transport - Go to Left Locator
Edit - Select Events under Cursor
Hope you find this helpful. Of course, you will want to assign these commands and macros to the keys of your choice that makes good workflow for you. Of course, this will work for more tracks but just adding commands to the macro. The numbers do not have to match as it works for up to 10 tracks at a time.
Hi @garymusic ,
Thank you so much for posting this.
Can you educate me when/why you would choose the “comp without lanes” method, over the more conventional alternative?
Thank you again!
It is just a workflow thing. I sort of like the way you work in Pro Tools when you comp a vocal. This sort of does the same thing. You have a top playlist/track and you promote to the top playlist/track. I don’t totally dislike lanes feature in Cubase but I like to move the sections to another track. The great thing about Cubase is with macros you can do either way. Hope this helps.
Thanks much @garymusic !
Actually I use streamdecks a lot and use generic and Mackie on them with no problems…
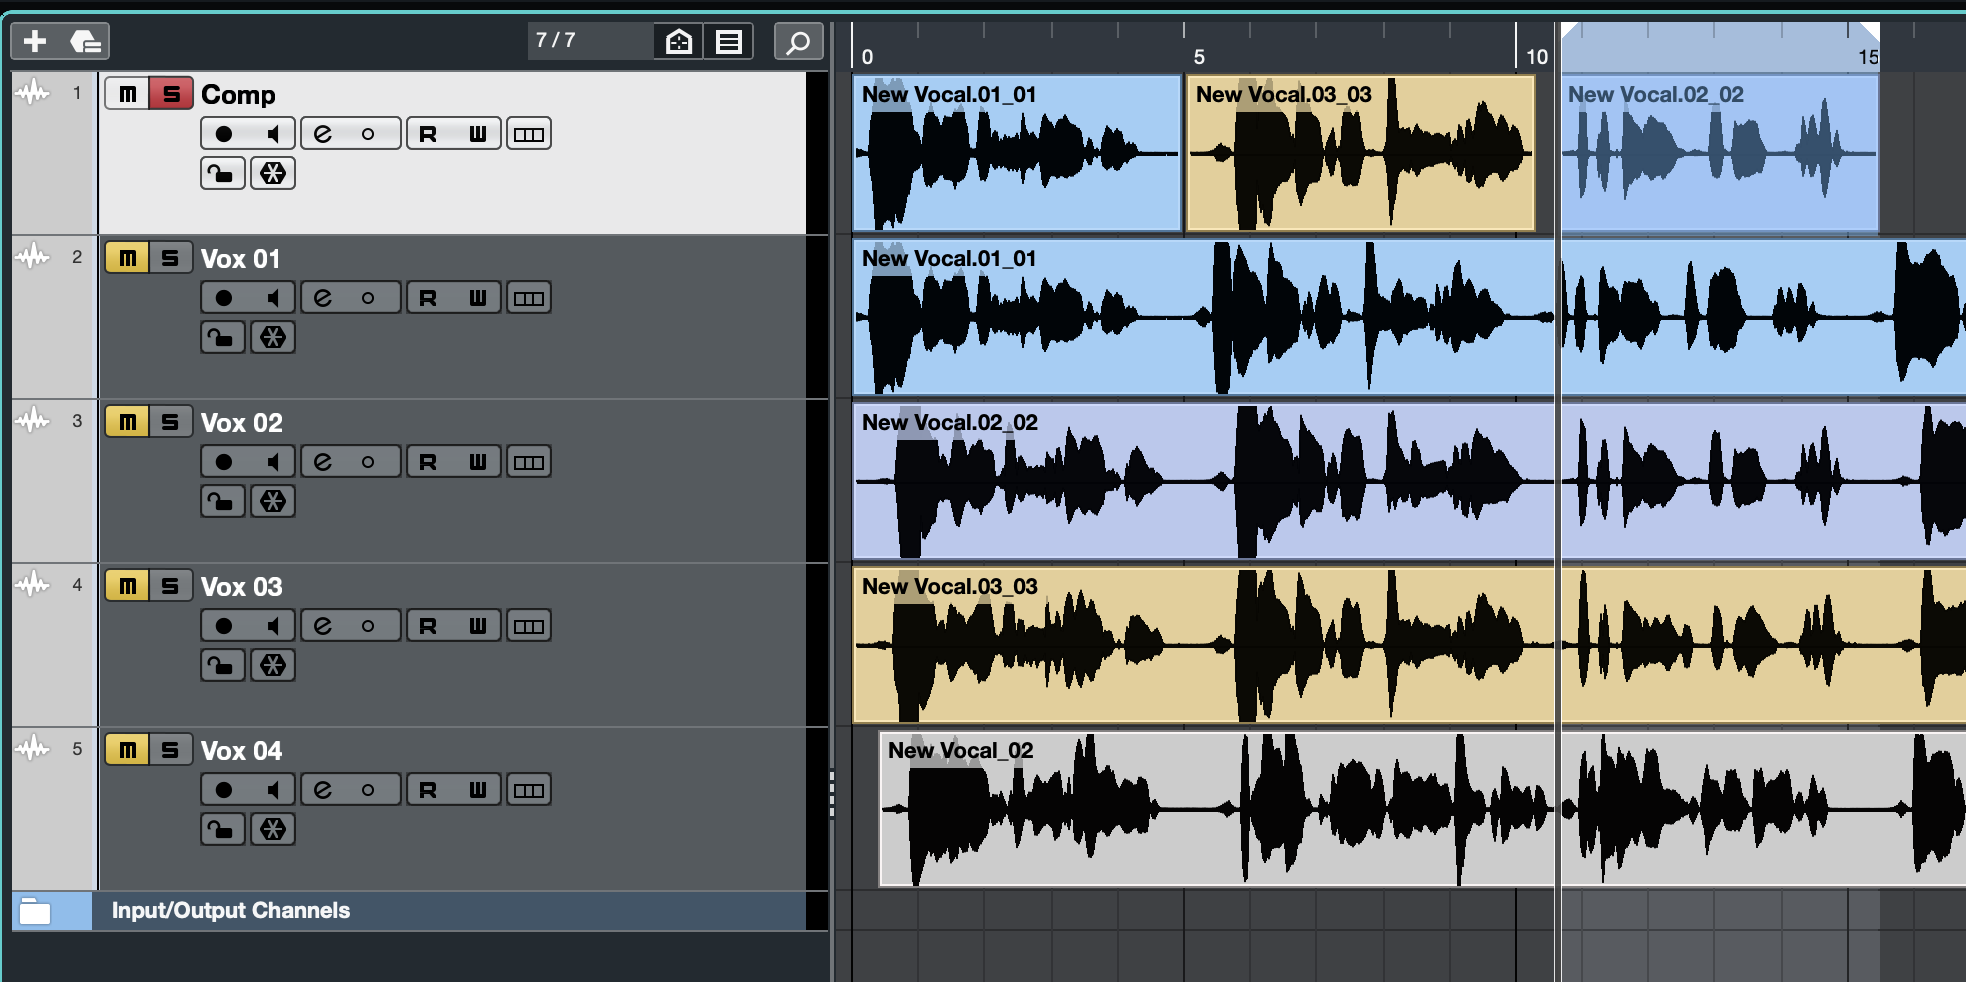
Vocal Comping without using Lanes
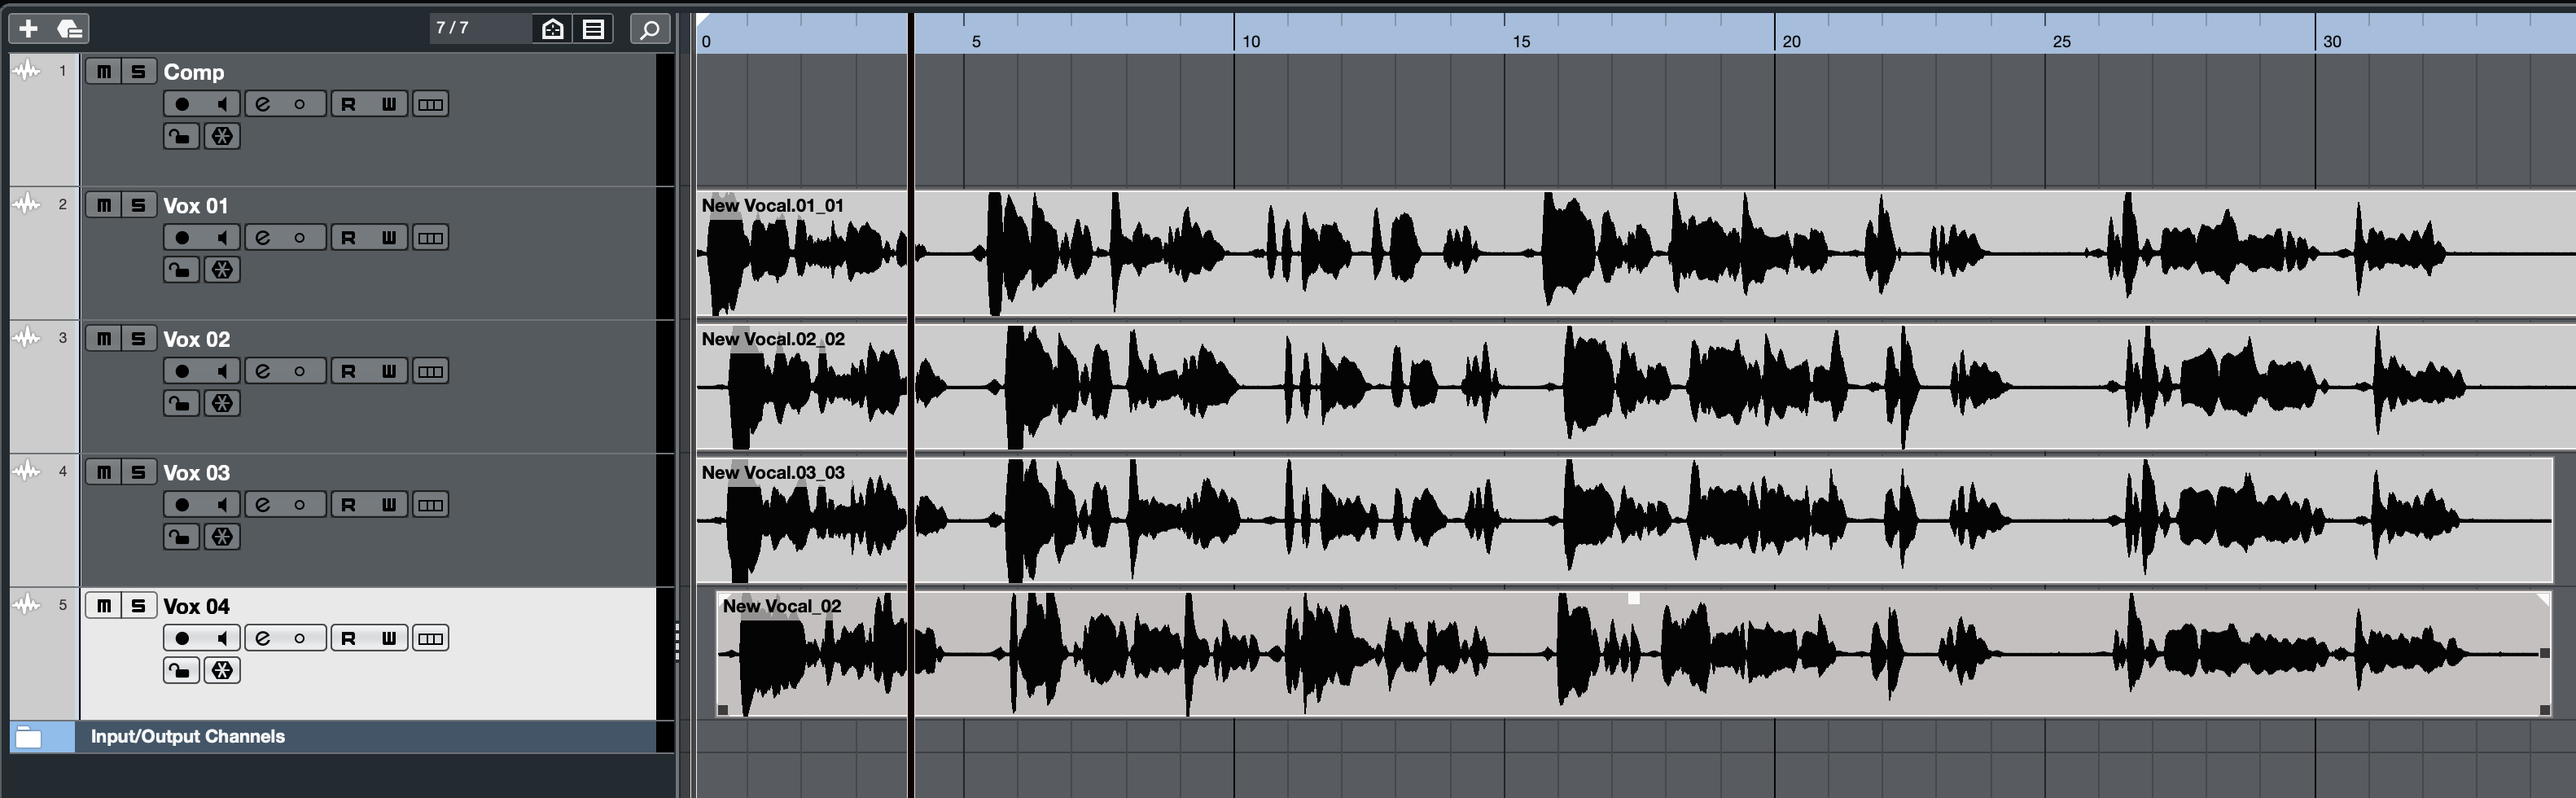
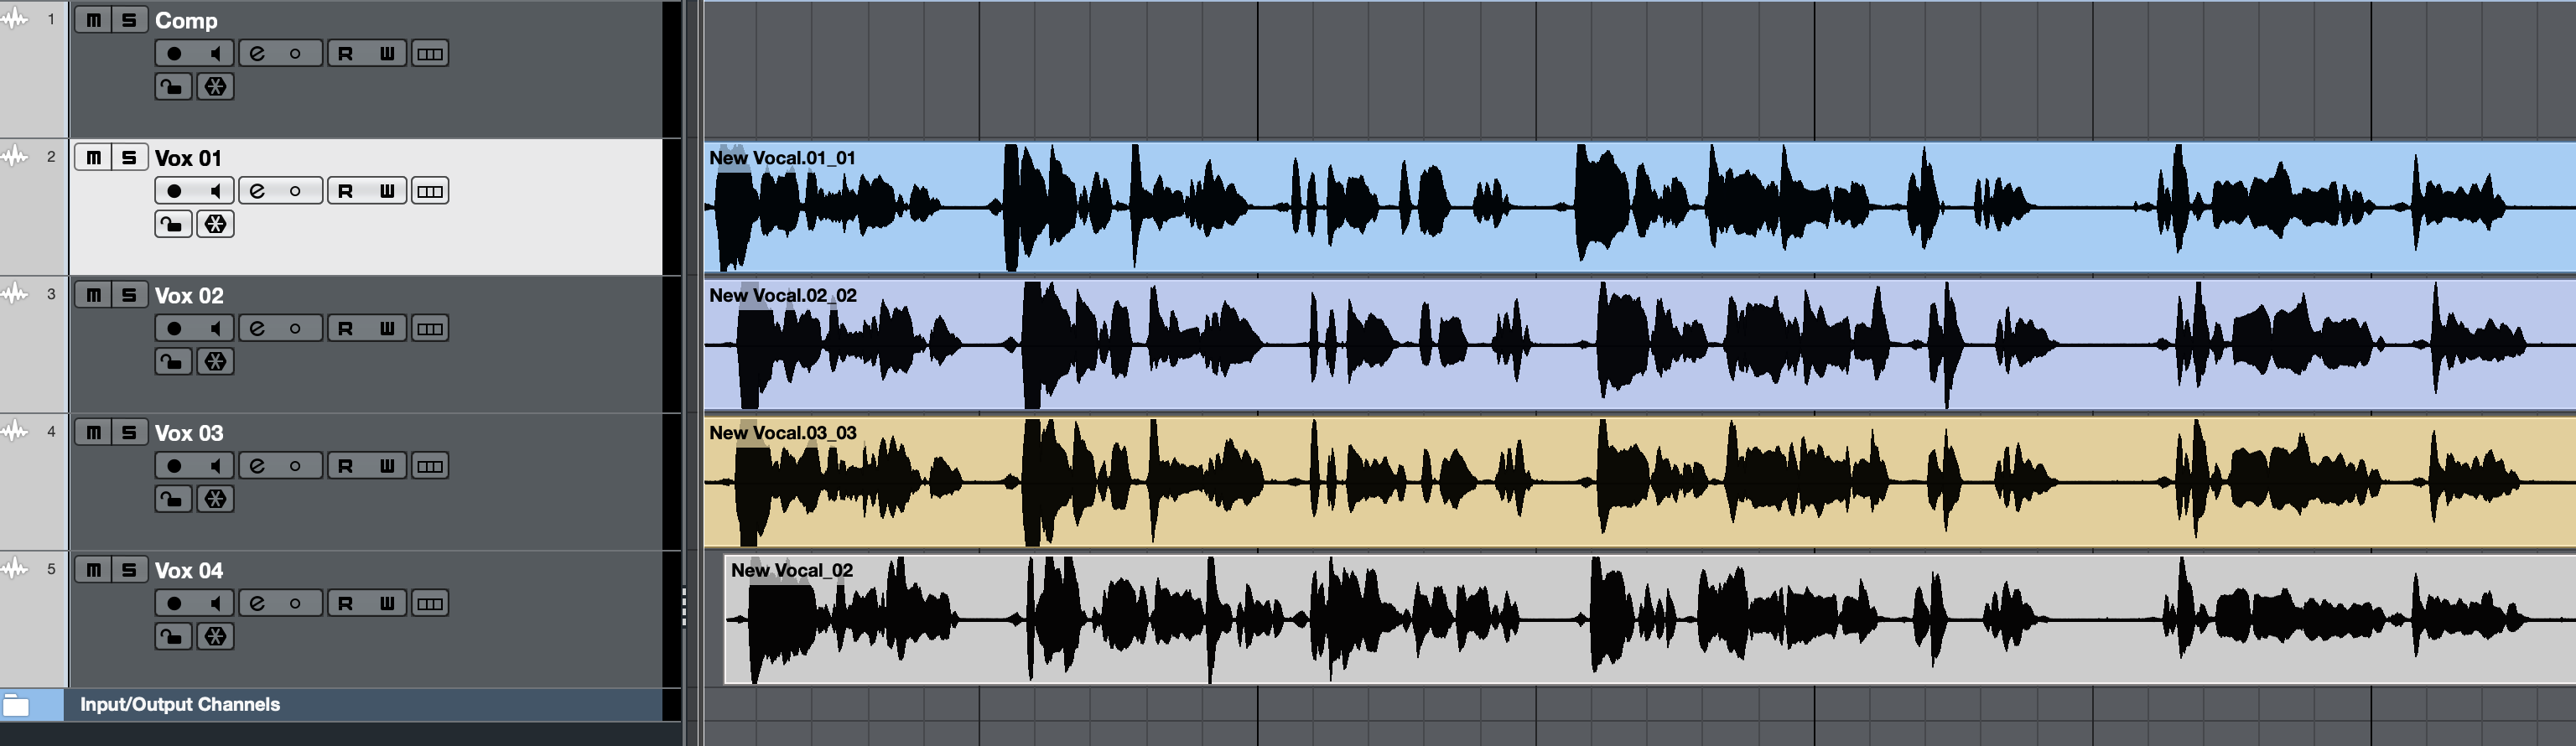
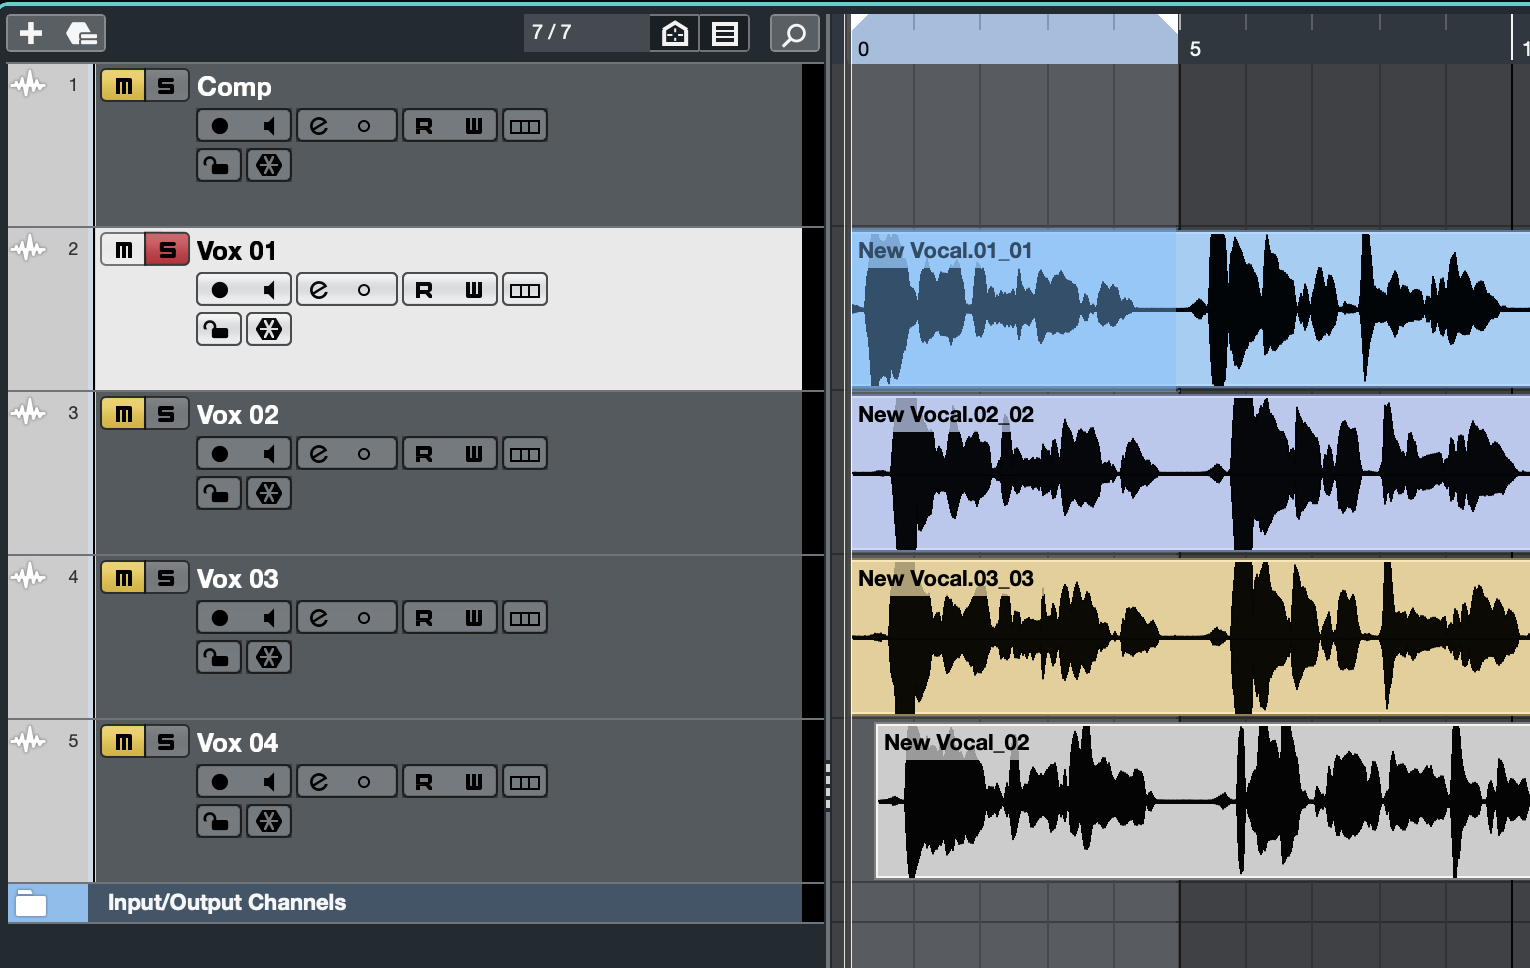
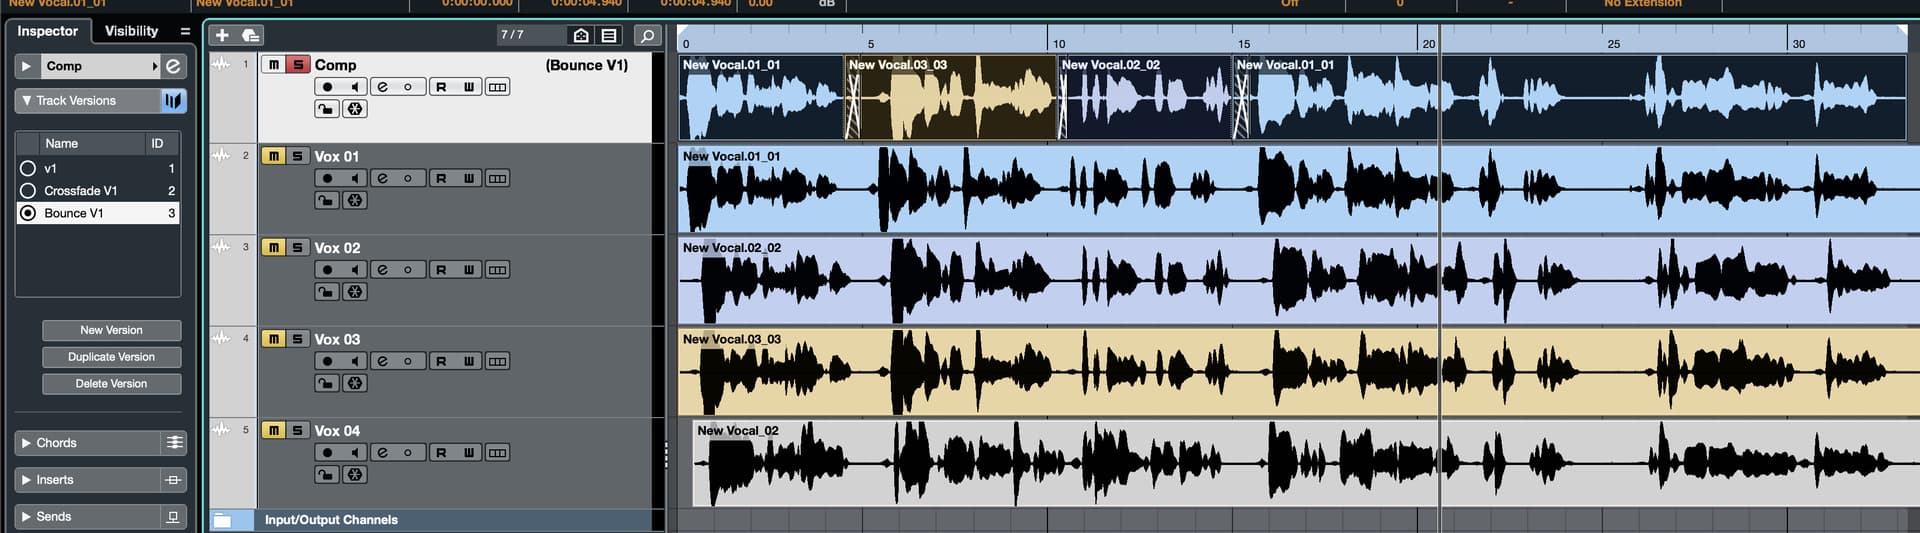
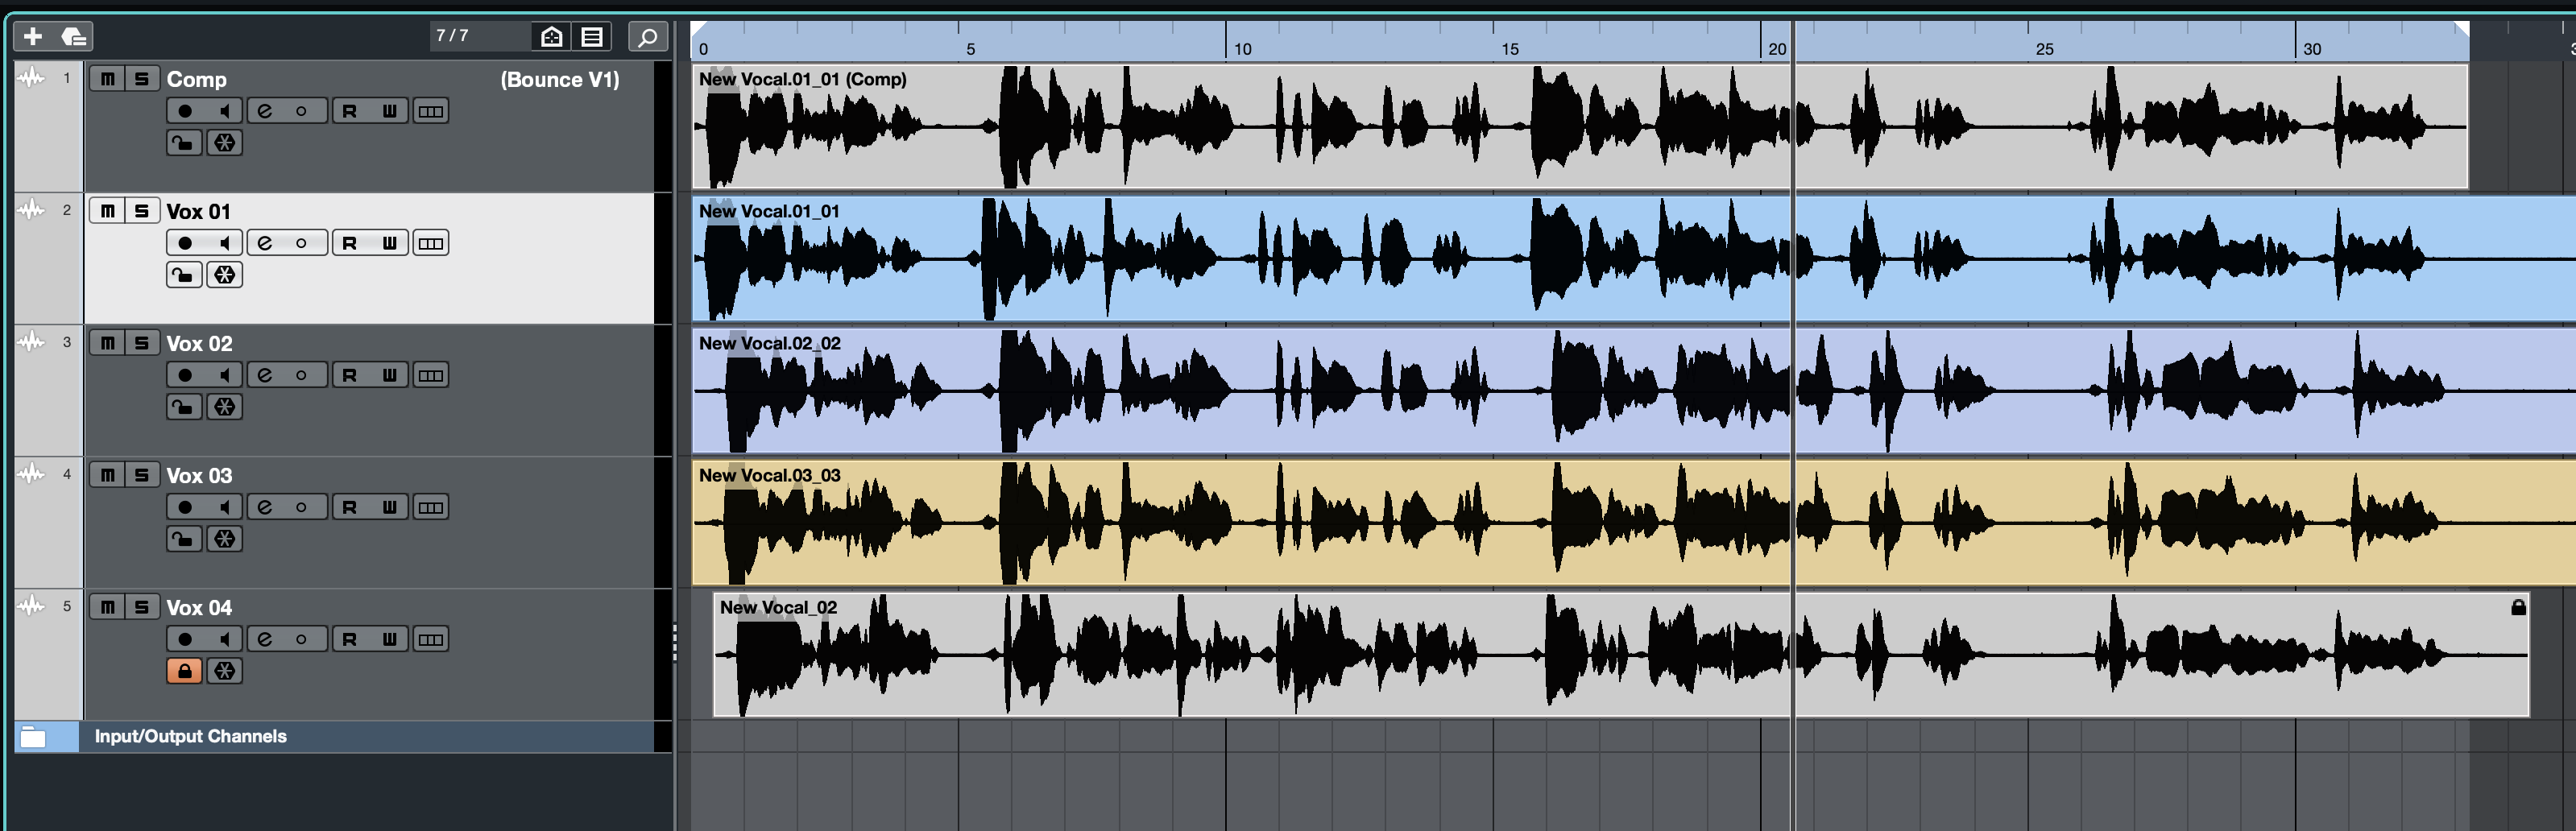
Here is a simple method to make composite tracks. It is a method to copy a highlighted section of an event to a “Comp” track. From the Comp track you then can crossfade and bounce to your final track. I like this method because it doesn’t involve slicing up a track before.
Here is the macro:
1 Start with some audio you want to comp
Color the tracks (Optional)
Use the Range tool to highlight a track and solo the track.
Next audition by using the Play-UP and Play-Down macros as in a previous post. This will play the track but also keep the highlight moving with the soloed track.
Keep doing this until complete
Duplicate the version so that you have a version to apply the crossfades.
Duplicate this version so you will have a separate version for the bounce.
Bounce the audio to make a separate one that will be used in the project.
That’s it. Even if you record in lanes you just use the Lanes to Track command to make separate audio tracks.
NOTE: You must have the “COMP” track the highest track in your project. Even the Input/Output Channels must be move to a lower part of the project.
Hope this helps someone out there.
@alexis Hi, I posted another method for comping a track. This can be useful when you don’t want to first slice up a vocal into individual sections.