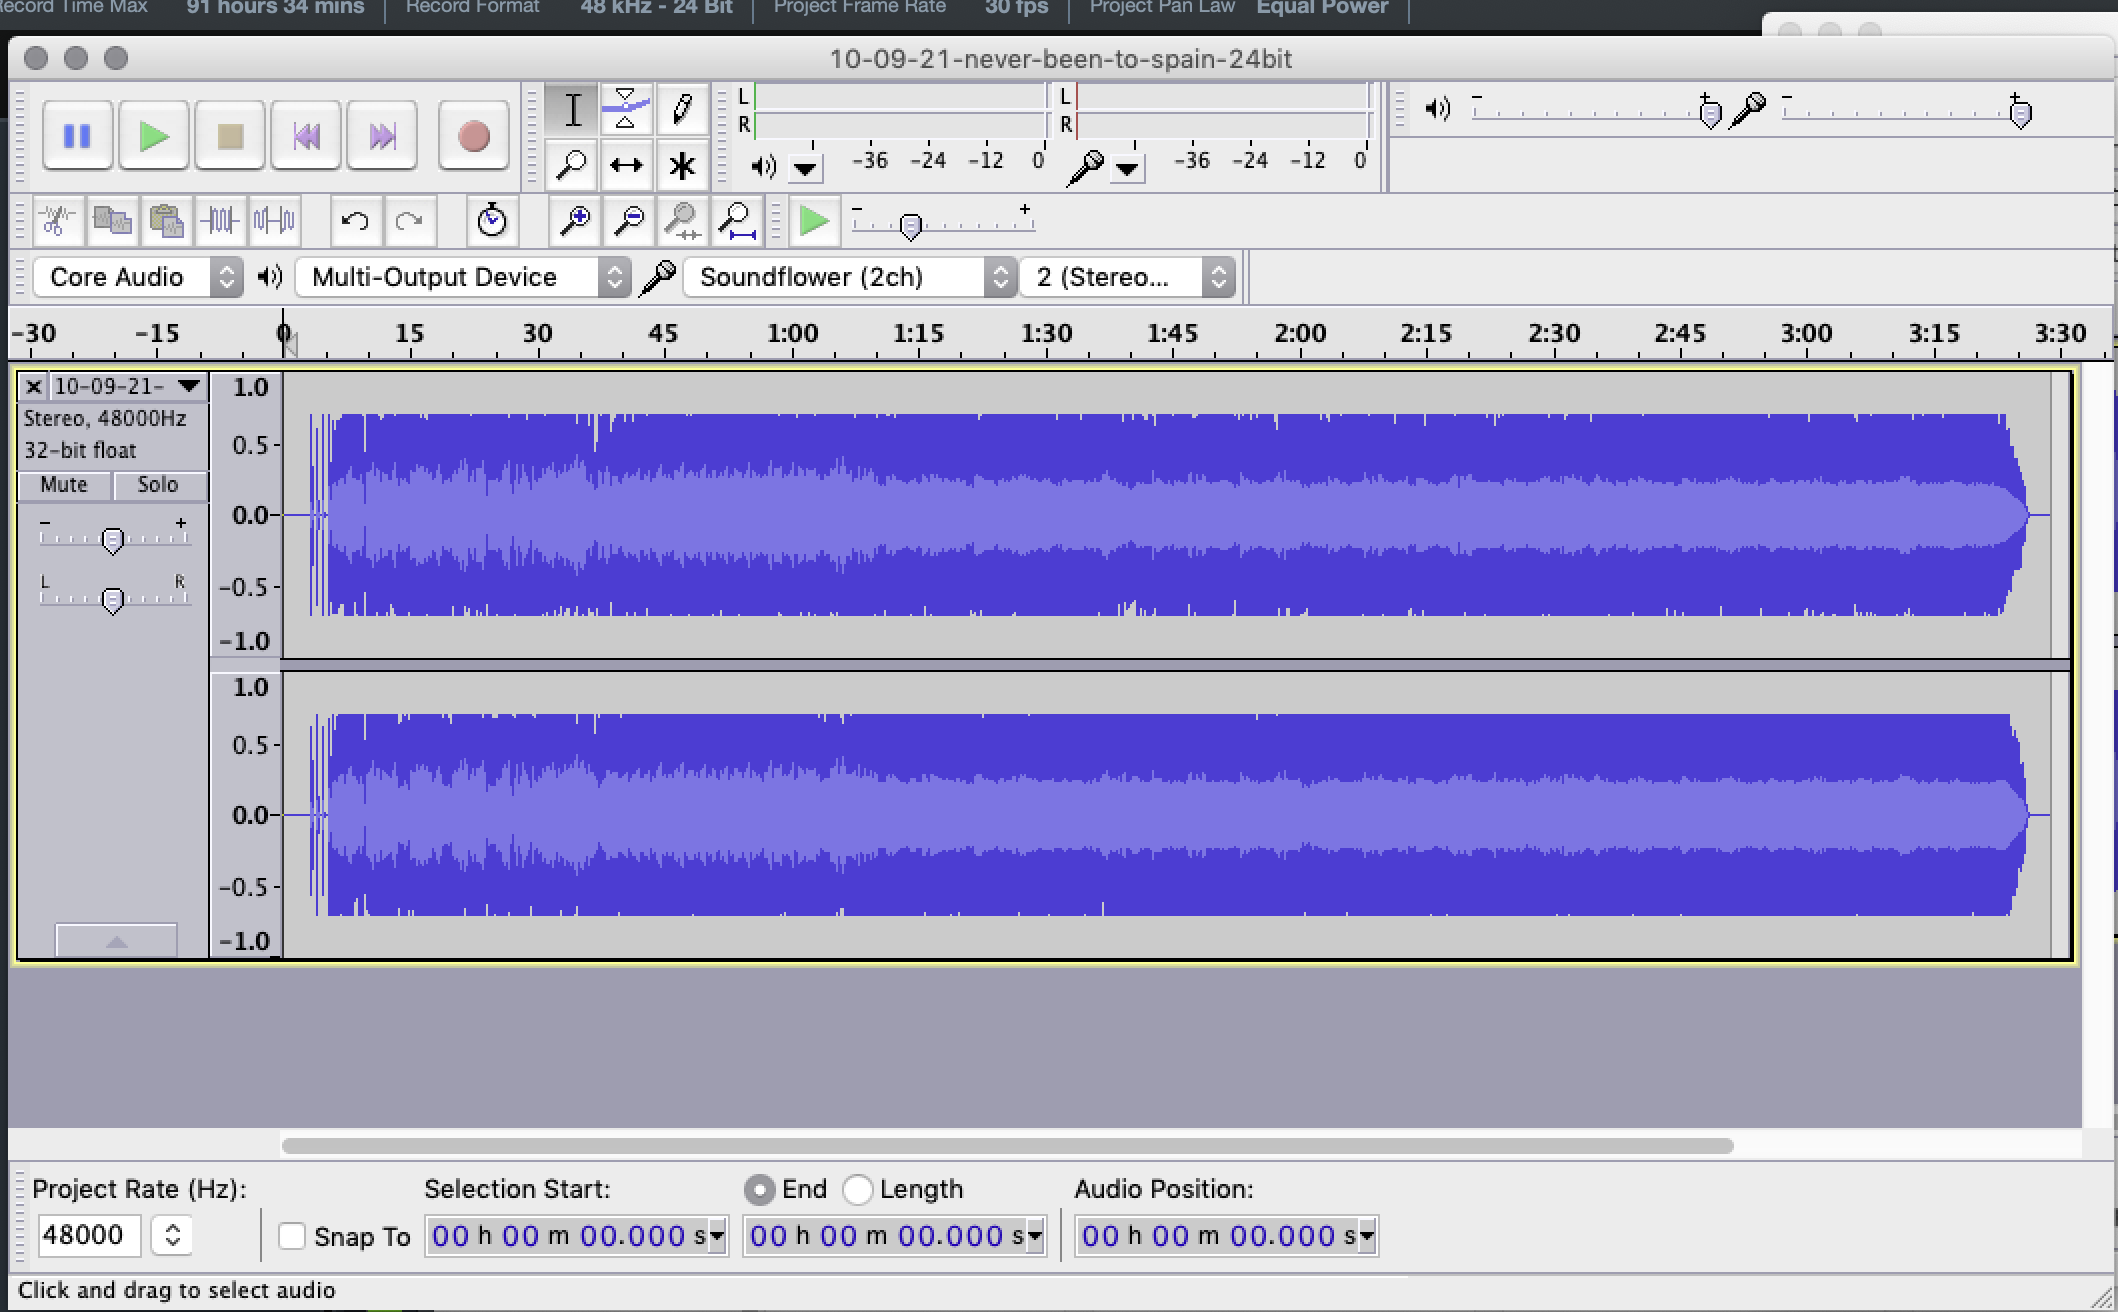
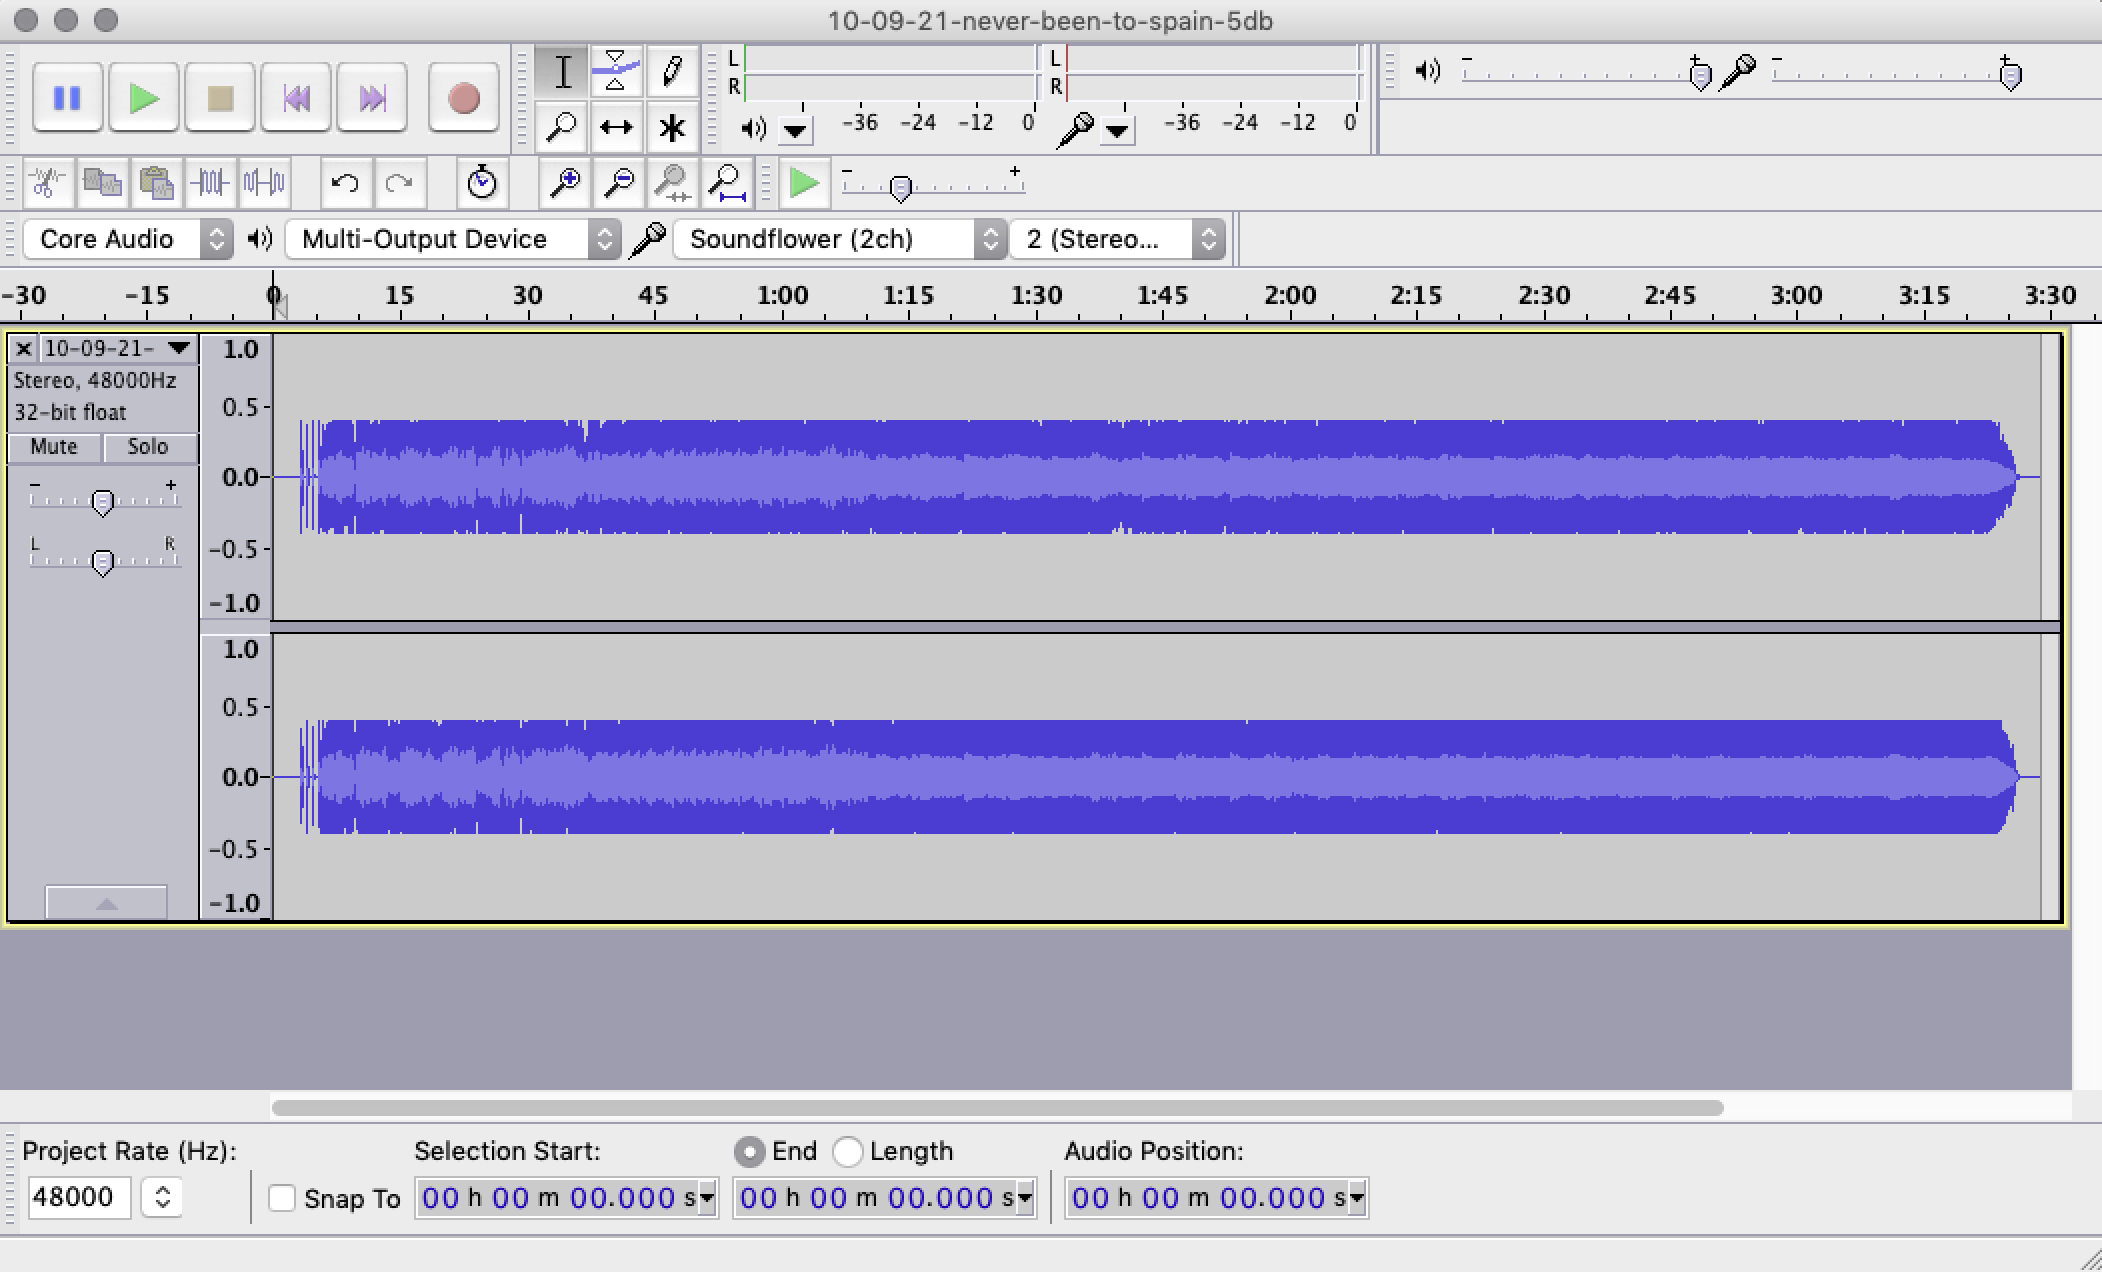
Sorry that I could not figure out a better title, but basically the audio mixdown file looks packed. Whether I set the output to -5db or increase the bit rate to 24bit, it just looks like it slammed to the max - see attached screenshots.
I have set the output of each track to various db levels, which all of them are -5db or lower, just to try to have some definition to the audio mixdown file. When I do not lower the db levels of each track, then it just looks like a bird’s eye view of a two lane highway.
You are looking in different programs. Single instruments will be less full than a full mix but what are you looking at? Is it a full mix? Was it exported from Cubase and did you use heavy compression limiting. Lastly in the other program are there different ways to view. Changing bit rate is not going to change anything.
Following what @mkok just said, changing the bit depth won’t change anything concerning the mix itself : it allows to lower down more, if needed, the noise floor, giving us also more headroom for recording. But it won’t change anything in an already clipping mixdown and magically reduce its output level of 48 dB.
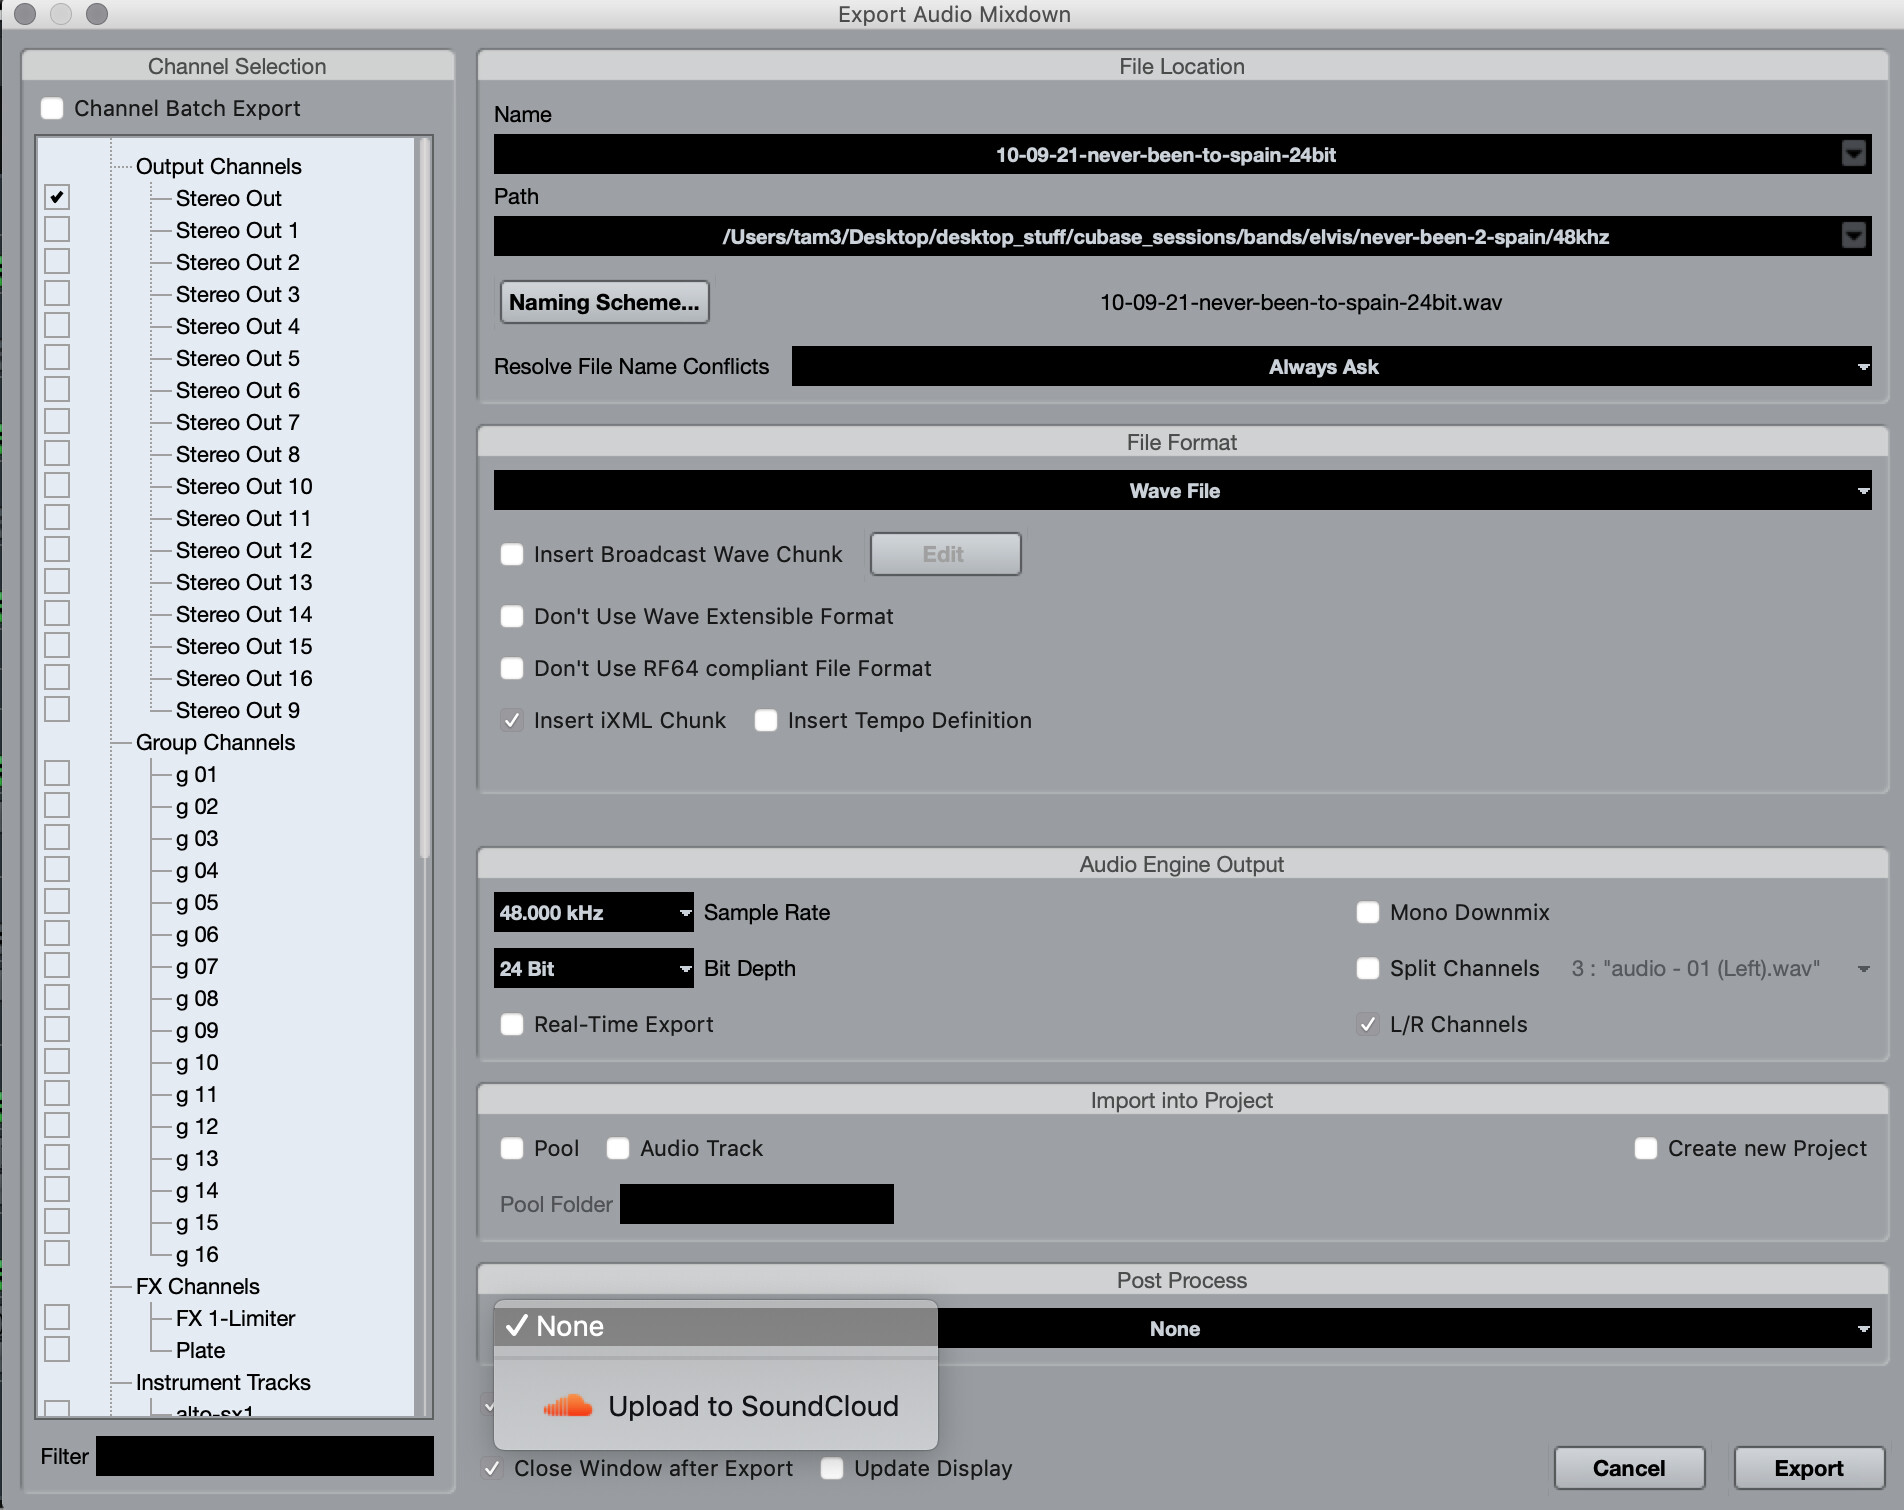
Beside this, does the mix sounds as expected (it indeed looks like there was a kind of brickwall limiting applied to it, the levels not having been taken care of) ? If so, did you try this option in the Export Audio Mixdown window ?
This creates an audio track which contains the full export just done. It would help to see how your overall mixdown is actually displayed in Cubase (added suggestion : make a screenshot of it and post it here…).
With that said, to answer your other question, it sounds ok to me, but when I have sent my mixdown to others in the past, they always comment on how it looks like everything is peeked to capacity. I am trying to change that now, before I send the file out next time.
OK. Seems like you are using what could be a Cubase 9.x version, from which the window layout differences (I use 11.0.40). But I see in the Import into project panel, an Audio Track option. So, you should be able to reimport directly your mixdown in the project.
Anyway, it seems that indeed the mixdown result is squashed almost as much as can be. And if others have already made a comment about it, there is something wrong : I would carefully check all what could have been inserted in your audio signal path (busses/group tracks, sends, main out channel…), deactivating everything that could be in it - including any eventual DSP effects coming from your audio interface - just to see what could be the results.
But first, and to be sure to keep everything retrievable, create first another version of your project with the File>Save as… command. Doing this will assure that your original project remains untouched.
After reading all of your comments, I went into each track and made changes to the eqs and maximizers, along with making similar changes to the stereo out, which included setting the eq to -6db
As a result, I have a waveform that does not look like it is at capacity all the time, but only at times when the horn sections, string and other instruments are at full output. When I complete the animation, upload to YouTube, then I will come back and add a link for you guys to tell me what you think of the recording.
For now, I will attach several screenshots showing the progression of changes
First the drums, bass and VST gtr were the biggest contributors to the peeking, so I changed their settings first
After recording each track and adjusting the eqs and maximizers, I reached this output, which is fine for now, but I would really like the whole output to look like the first half. It is understandable seeing the entire horn section, strings, as well as, the core instruments are all playing from the lead onward
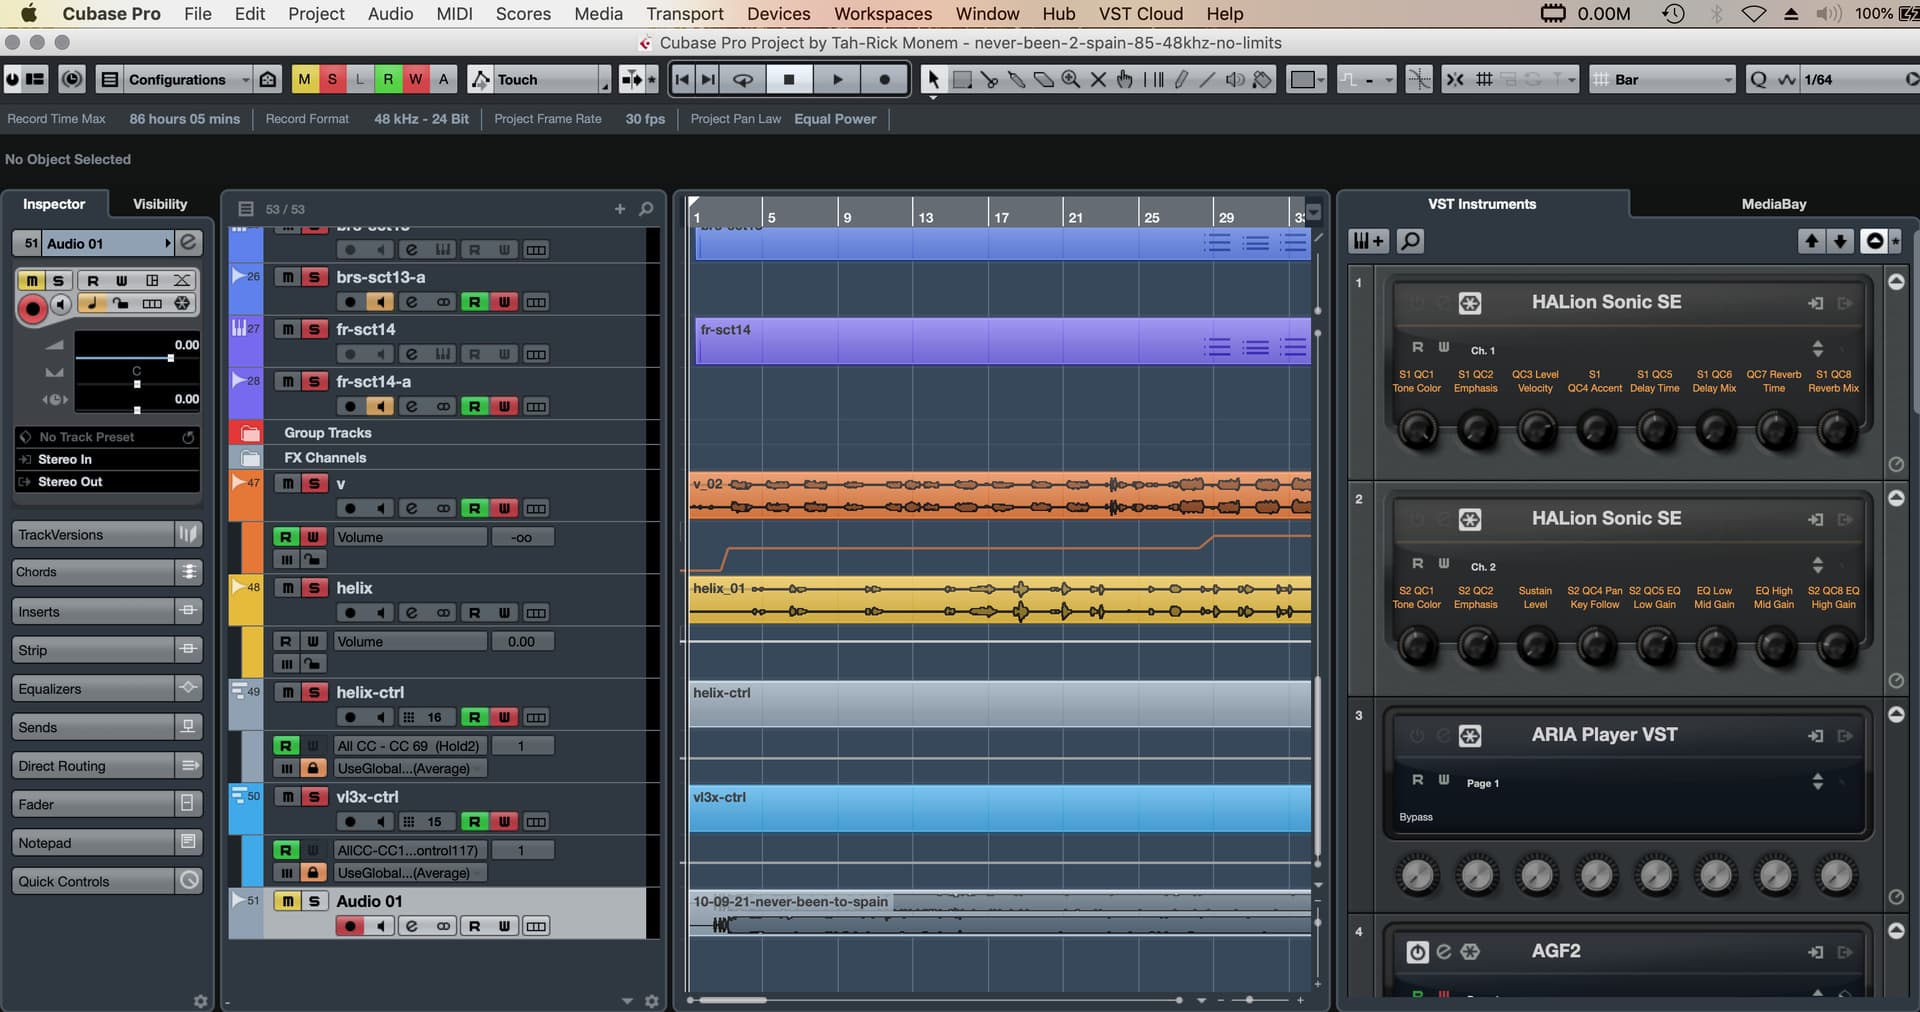
The first screenshot is interesting. Few observations and questioning about it…
I reckon that the audio tracks with the -a postfix are the rendering of the instruments ones just above them.
From which, I am wondering why the three last of them have such huge levels, as it seems that the magnifying waveform tool is not involved, in this case (something I would check, though…). As an example, here is what I get with VB3 (a B3 clone VSTi, which is rather loud, even at a rather ‘normal’ volume setting), squashing a full hand on the keyboard and with both the volume of it and the channel audio fader set to max (+6.02) :
Only when doing this, I get something rather similar to yours. So, I could be completely wrong, forgetting an essential ‘detail’, but still… I’m wondering how you can get the waveforms of the audio tracks shown, beside using your EQ as an overall ‘gain’ insert (or something else drastically increasing the output level of your VSTi) somewhere in Cubase audio path.
From which, Could you add a screenshot of one the instrument tracks involved with the VSTi window and possibly a description of its routing ? Beside this, it would be also interesting to see one of these instrument tracks rendered with only the ‘Dry’ option…
The reason why the drums, bass and guitar have “fatter” waveforms than the others are intentional. I am adding a maximizer set to 55 optimize. The reason for this, is that people who used to listen to my tracks prior to me adding a maximizer and eq, would complain that they could not hear the drums, bass and guitar tracks well enough or they lacked punch or pop.
While trying to take screenshots for you, I noticed that the gain on drums eq was set to 2.2db. When I changed it to zero, it did seem to not make much of a difference. So I changed it to 3db, which was the setting when I first started to make the drums stand out - specifically the kick drum.
BTW, even after changing it to 3db, when I took the screenshot, it was down to 2db. I have no idea why it is changing.
Before when there seemed to be no waveform and everything was at capacity, the maximizer on each track was much higher for the optimize, along with the output sometimes being set to as much as 3.0. By changing all of them to output of 0.0 and the highest optimize being set to 55 for the drums, allowed the waveform to have some definition to it, rather than being slammed to capacity
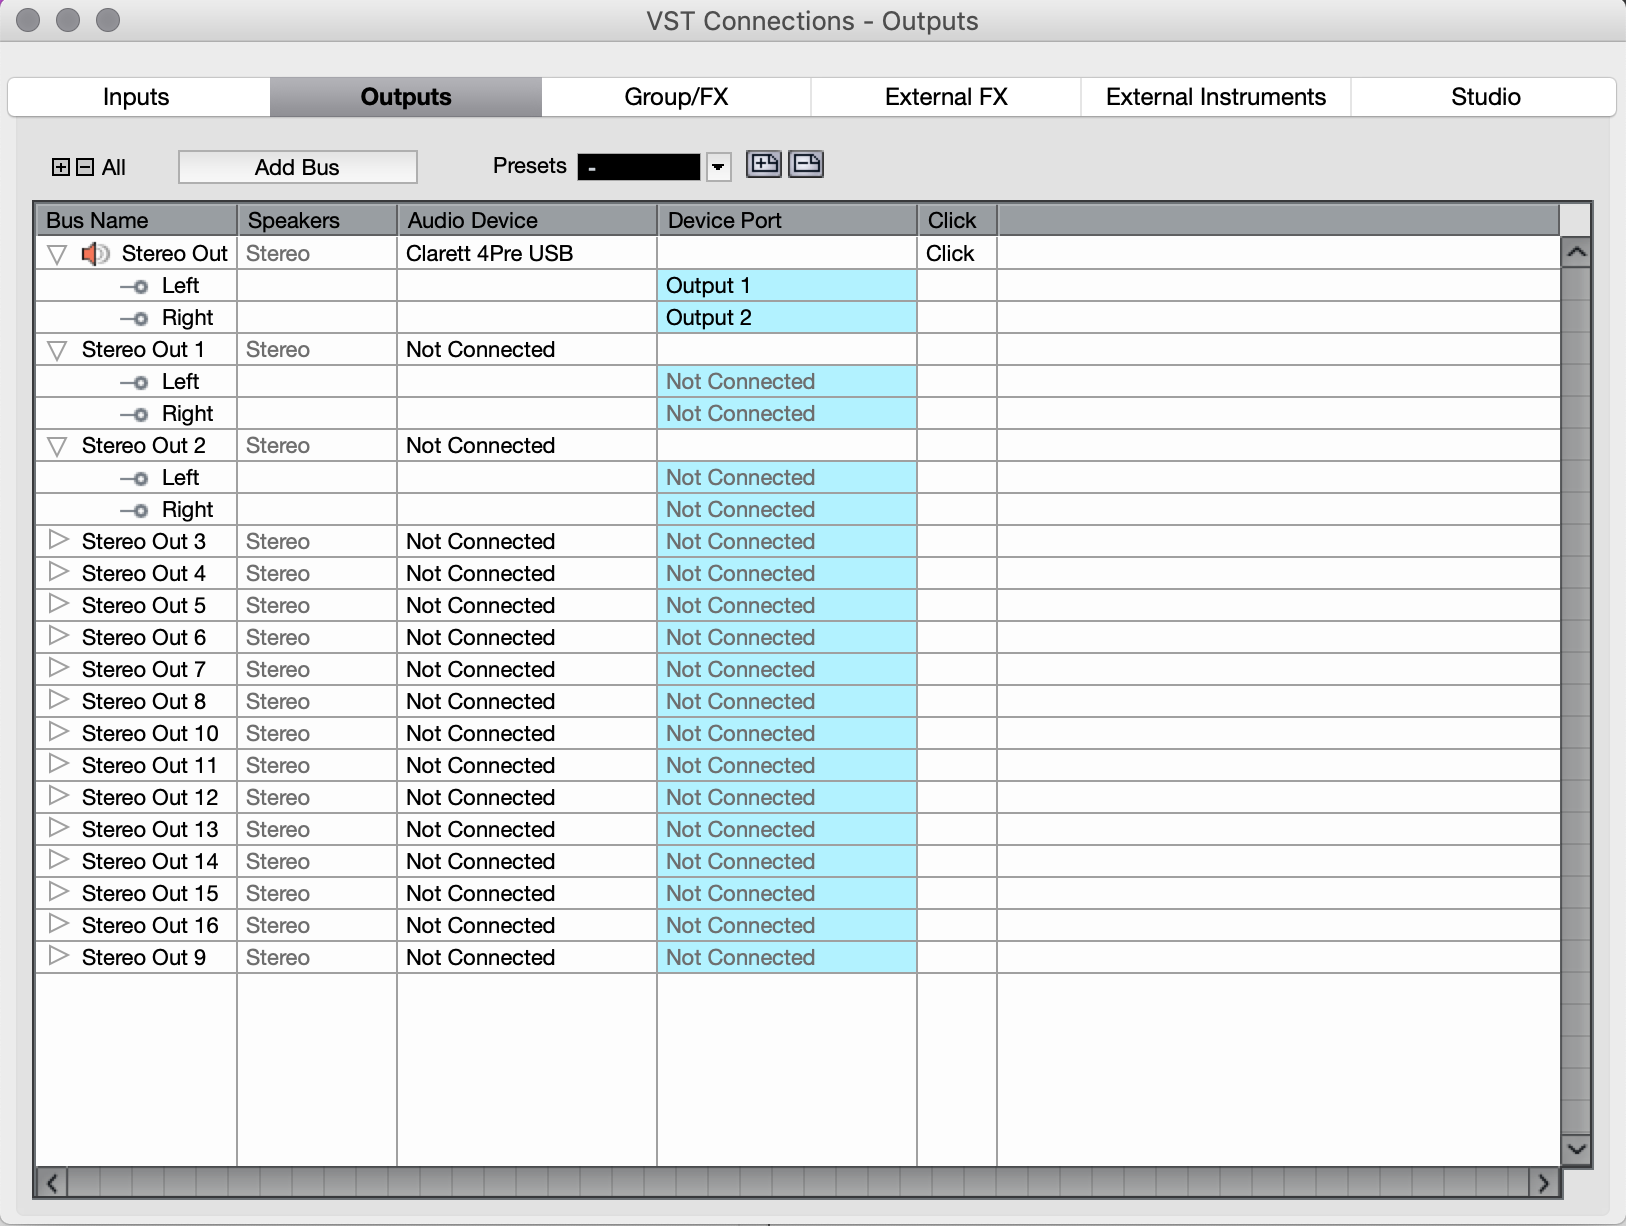
As for your question about routing - My VST Connections
I have the instrument tracks set to go to a group, which then in the VST Connections is set to go to stereo outputs that I have setup. It is my way of the doing the old patchbay thing for analog. I know that I do not need it, but I do it out of habit
Thanks again. I will send the link to the final video when it is complete. You really helped me dig in and change the file to where it now has some definition to the waveform - especially from the beginning of the song, to the end of the guitar solo section.
As promised, I have completed the animation and uploaded the video, so that you can critique the new audio file, which now has some headroom, thanks to your suggestions: