RIGHT…Here goes how I’ve got MIDI Remote (MR) and my clever little Studiologic Mixface and the rather retro looking Remote Control Editor (RCE) to all work in harmony to produce the most satisfying and fully working knob concerto that I didn’t ever imagine was lurking in Cubase…!!
This is going to be HUGE, by the way, but I’ll do my best to be CLEAR…
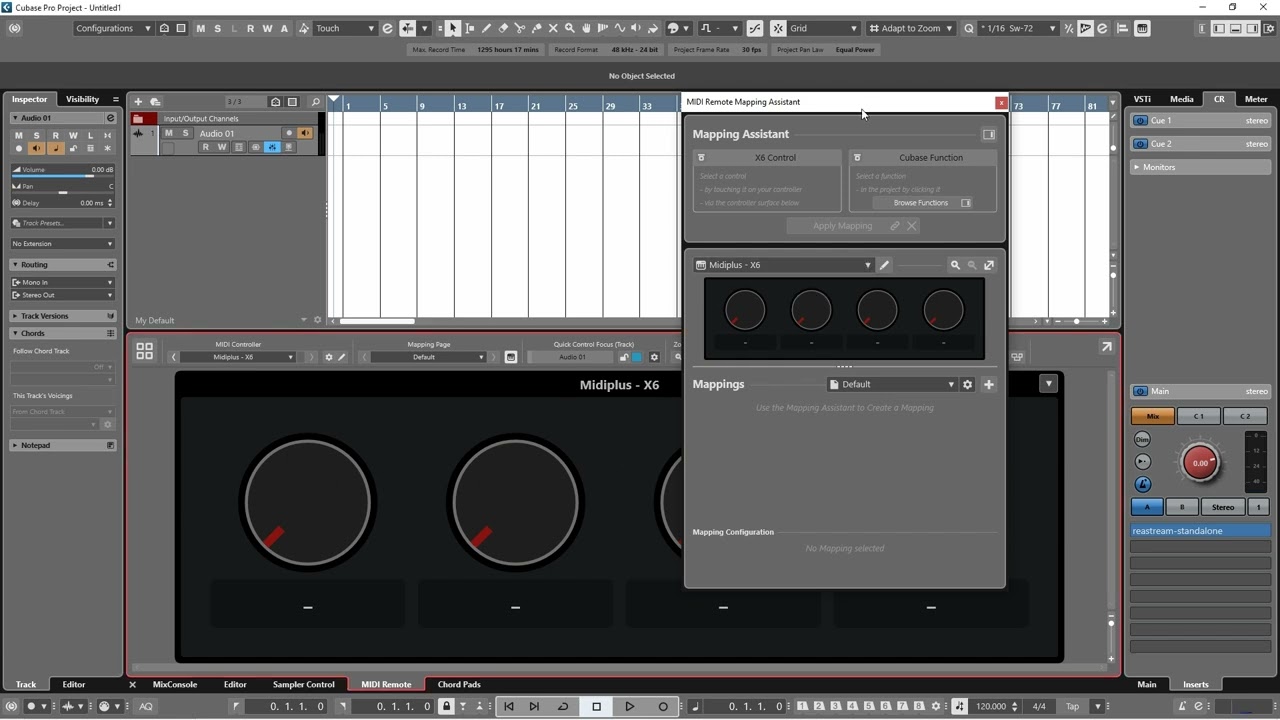
So, for anyone new, there are instructions or links to videos earlier in this post from ggmanestraki on how to set your particular controller up with the correct number of Parameters on the right-hand pane of the MIDI Remote Mapping Assistant (MA) which relate to the knobs on the Remote Control Editor, available on each VST plugin by right-clicking near the top of the GUI. I chose, for test purposes, just to choose 8 parameters and 8 corresponding knobs on the RCE and my controller. With the RCE I deleted all previous entries and excess pages, so here it is with the Learn function activated and the first slot selected:
And here’s what the Mapping Assistant left-hand page looks like with the list of Parameters on the right-hand pane assigned to knobs on my controller:
And heres my MIDI Remote set up for my Mixface, with 8 knobs assigned (and a button for opening instrument edit). Oh yes, and I’ve also created two Instrument Tracks, one for Padshop and one for Retrologue:
Now that I’ve assigned these 8 Parameters as described in gg’s link, they are now set up for any new project, it seems, so for the demo I’m describing I didn’t have to go through that stage again - very handy indeed.
NOW THERE ARE JUST TWO SIMPLE STAGES TO COMPLETION.
STAGE 1 - Assigning the plugin knobs to your physical controller using the RCE and MIDI Remote Mapping Assistant.
-
Open MIDI Remote in Edit mode and open the Mapping Assistant, if not already open. Note it may not be necessary to be in edit mode as long as the MA page is open.
-
Have your first track selected and open the instrument edit so that you can see your plugin’s GUI, then right click near the top and open the RCE from the drop-down menu.
-
Within the RCE, clear any existing assignments by clicking the button two to the left of the Learn button then select the first empty slot. Remember to have it in Learn Mode - see top right of RCE. See first screenshot above. Also, you can delete any unwanted pages, but it doesn’t really matter; I’ve just done it for clarity.
-
Move your first physical knob on your controller (in my case Mixface).
This will populate the left-hand box at the top of the MA page like so:

Ignore the fact that in my case it’s labelled CH 1 Osc as that’s from a previous assignment. Yours should probably read Parameter 1.
- Move a knob or slider on your VST plugin (Padshop in this case) that you want assigned to Knob 1 on your controller. This will then populate the right-hand box above:

YOU MAY HAVE TO DO THIS MORE THAN ONCE BEFORE IT ‘TAKES’
- Now click on Apply Mapping. If you come out of MIDI Remote edit mode and turn the first knob on your controller you should see both the MIDI Remote first knob moving and the RCE first knob moving, along with the correct VST plugin assigned knob or slider - so far so good. After checking, put the MIDI Remote back into edit mode - actually, this may not be necessary as long as the Mapping Assistant is still open.
NOW REPEAT THE ABOVE PROCESS FOR THE NUMBER OF PARAMETERS THAT YOU ASSIGNED AT THE BEGINNING (in my case, eight). Make sure the RCE stays in Learn Mode and at the end of the whole process, click the Apply button on the RCE, two to the right of the Learn button.
YOU CAN NOW CLOSE THE REMOTE CONTROL EDITOR. The Mapping Assistant page should now list all the assignments you just made:
STAGE 2: Re-assigning the Parameters on the Selected Track/Instrument/Parameters/Actions Parameters 1-8 (or how many you have previously assigned). This is in the Function Browser pane to the right of the mapping assistant, which you should already be familiar with: note the path is Selected Track/Instrument/Parameters/(Setup)/Actions/ Parameters 1… however many you need.
This is where I previously got stuck: you have to go back and reassign the parameters as explained below or it just won’t work.
-
Select the first Parameter on the right-hand panel as I just described above.
-
Move the corresponding knob on your hardware controller - you should see the VST plugin assigned knob moving and also the associated knob on the RCE if it’s still open.
-
Hit ‘Apply Mapping’ again on the Mapping Assistant. This will change the entry in the list below and remove the wording of your assignment, i.e. Filter Cutoff or whatever and replace it with what you see below (in my case after all 8 were done):
THIS IS CRUCIAL. All the listings must read as above and not show the actual names of the assignments. This took me days to suss out, folks!
YOU CAN NOW MOVE ON TO THE NEXT TRACK AND DO EXACTLY THE SAME.
And now - ta da! - when you change tracks, your knob assignments will change too, to the ones assigned to the instrument on that track. Pretty f’ing genius, I think, but it took some figuring. Thanks to all those above who helped, particularly ggmanestraki, and although I feel I’ve added valuable new input here, apologies if it was already described this way earlier in my post and I just didn’t follow it right!
Byeee!


