I need some help, please!
This is the first time I try this ![]()
How do I get ISRC codes from a montage into the individual wav files ?
I have the codes in the montage, and used the metadata factory preset ISRC (AXML+ID3v2)
But when I render as individual tracks, I don’t see the codes in Sonoris ISRC editor.
I did have a look here - Imbed ISRC codes into stand alone BWF files and several other places here, but I’m missing something.
I’d love a detailed walkthrough for dummies… ![]()
I assume you have entered the ISRCs in the CD Tab of the source montage?
Are you able to share a screen shot of what you see in the Metadata Tab of one of the rendered WAV files if you open it in the Audio Editor of WaveLab? That could provide a clue.
I also did this long but thorough video on Metadata in general:
And since I haven’t used the Sonoris ISRC Editor app in a couple years, I just double checked my WaveLab method in the Sonoris ISRC Editor app and the ISRC appears no problem:

Thank’s for trying to help me out ![]()
Yes!
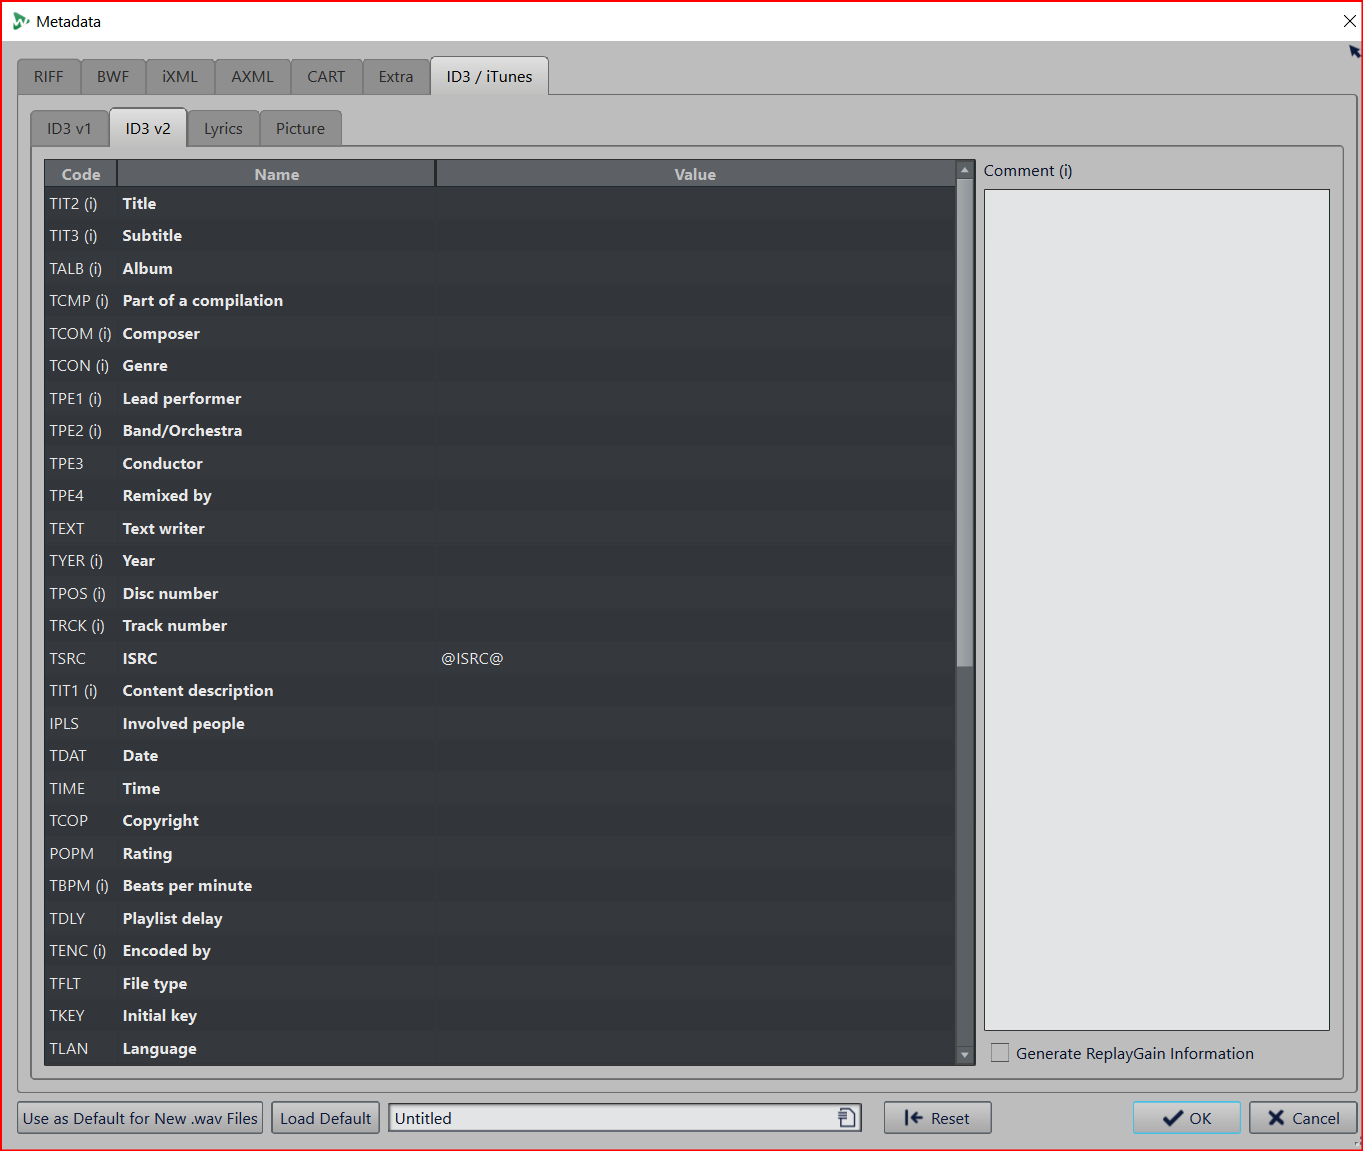
Here’s a screenshot of the wavefile rendered from the montage.It’s the same as in the montage. I don’t see any ISRC code.

And Sonoris shows nothing
Yes. it appears to be totally empty so I’m guessing you need to do one or all of these things:
- Make sure the code is added for that CD-Track in the CD Tab of the Audio Montage.
- Make sure you’re rending the WAVs as “CD Tracks” and not as selected clips or anything other in the Render Source Options. It needs to be rendering CD-Tracks for certain things to be attributed to the resulting file.
- Make sure the correct Metadata Preset or settings are chosen in the Metadata Tab of the Audio Montage before rendering.
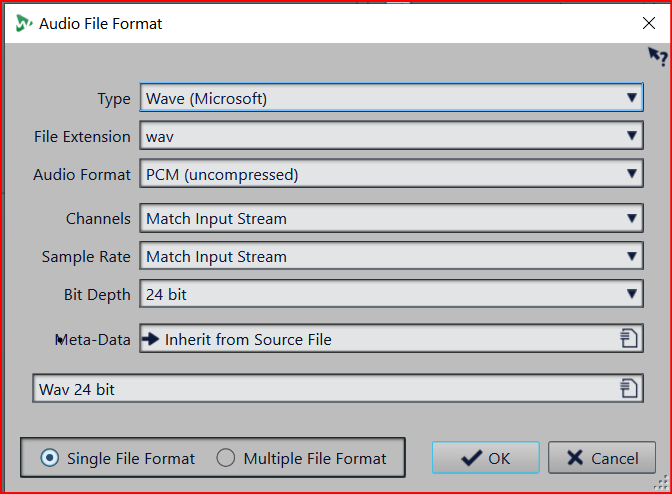
- Make sure “Inherit From Source File” is chosen in the Audio File Format options before rendering. (See attached).
It’s not really possible to say more with the amount of info you’ve provided so far.
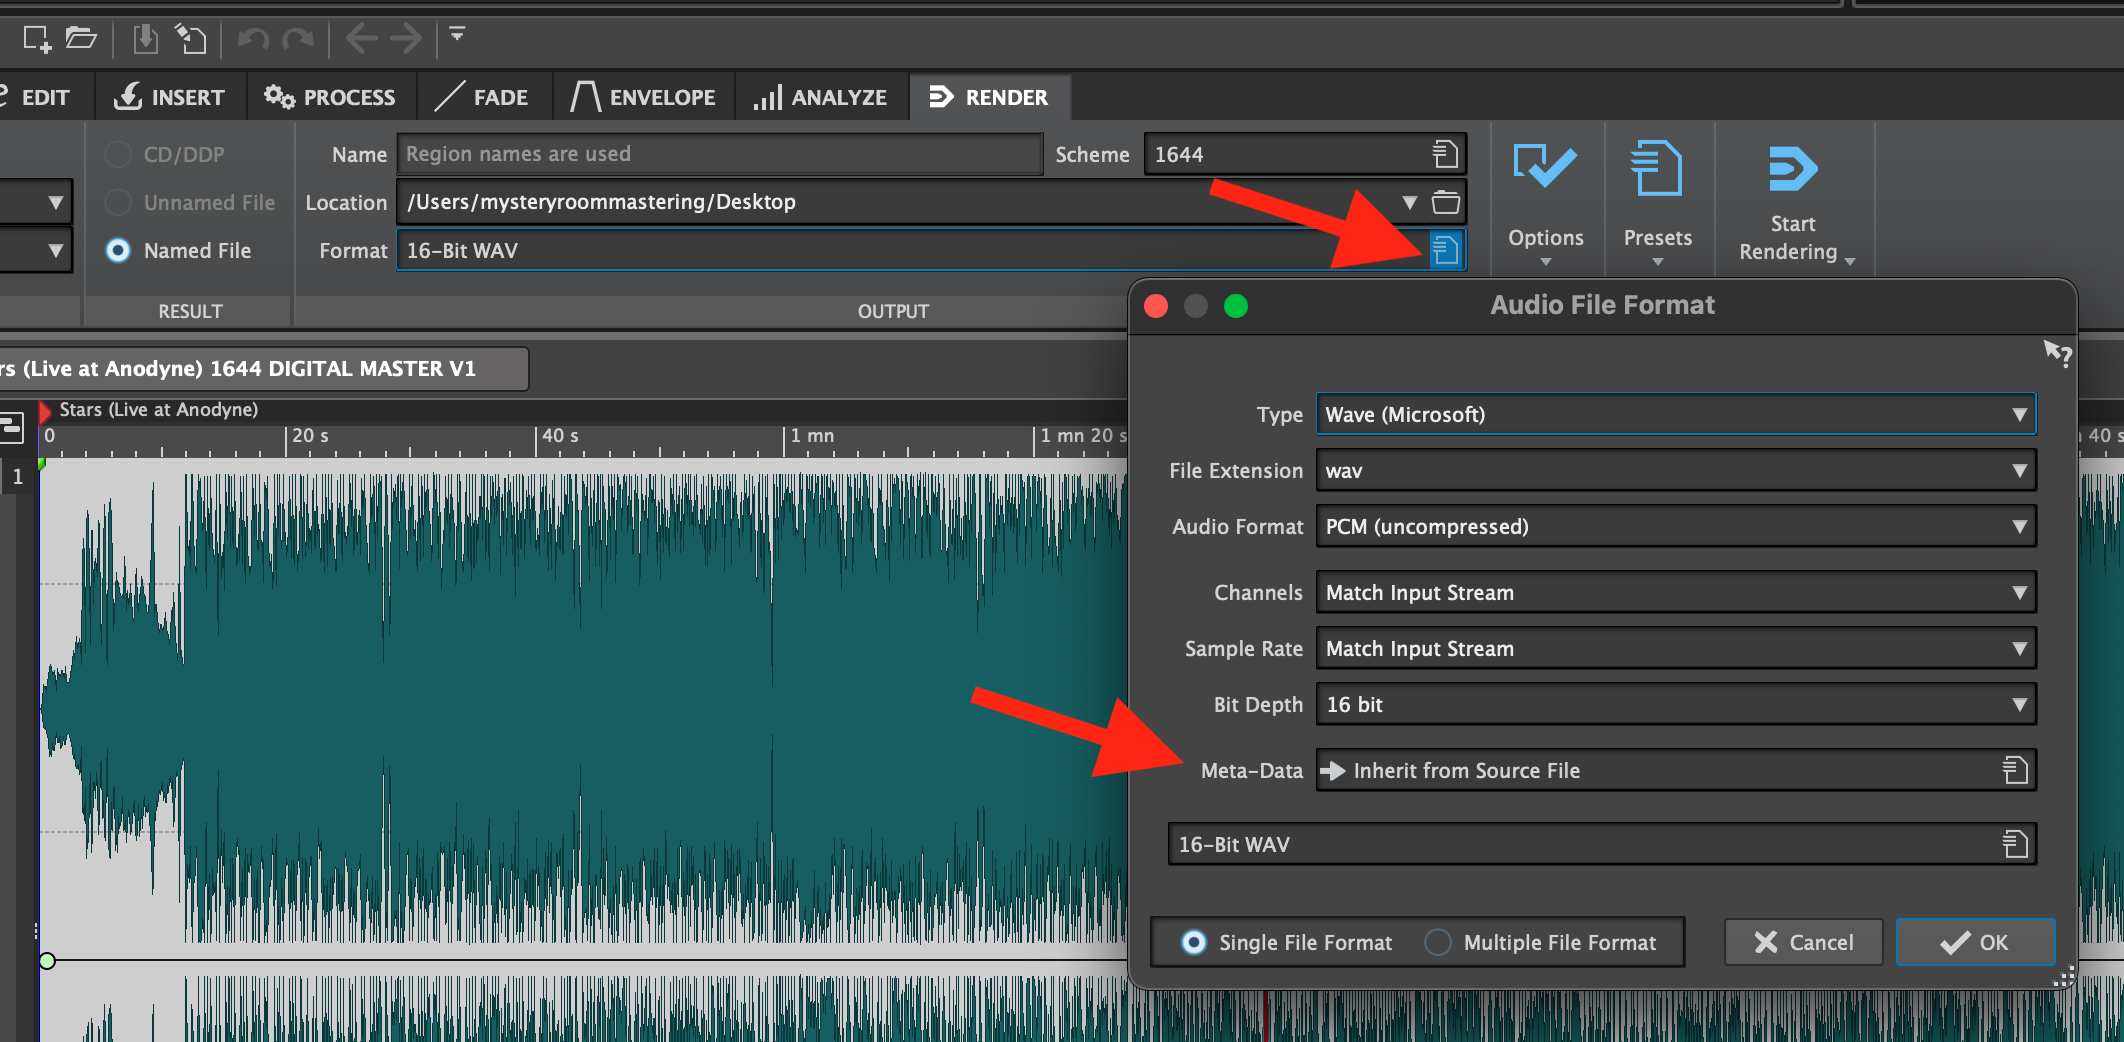
And also, in the Audio Montage you won’t see the actual code in the Metadata Tab. You’ll see an @ symbol that tells you it’s going to grab the ISRC from the CD-Tab (if it exists) but here is what my Metadata Tab in the Audio Montage looks like. It grabs existing info in the montage and populates it upon rendering a WAV or mp3 of each CD-Track:

I still don’t get it ![]()
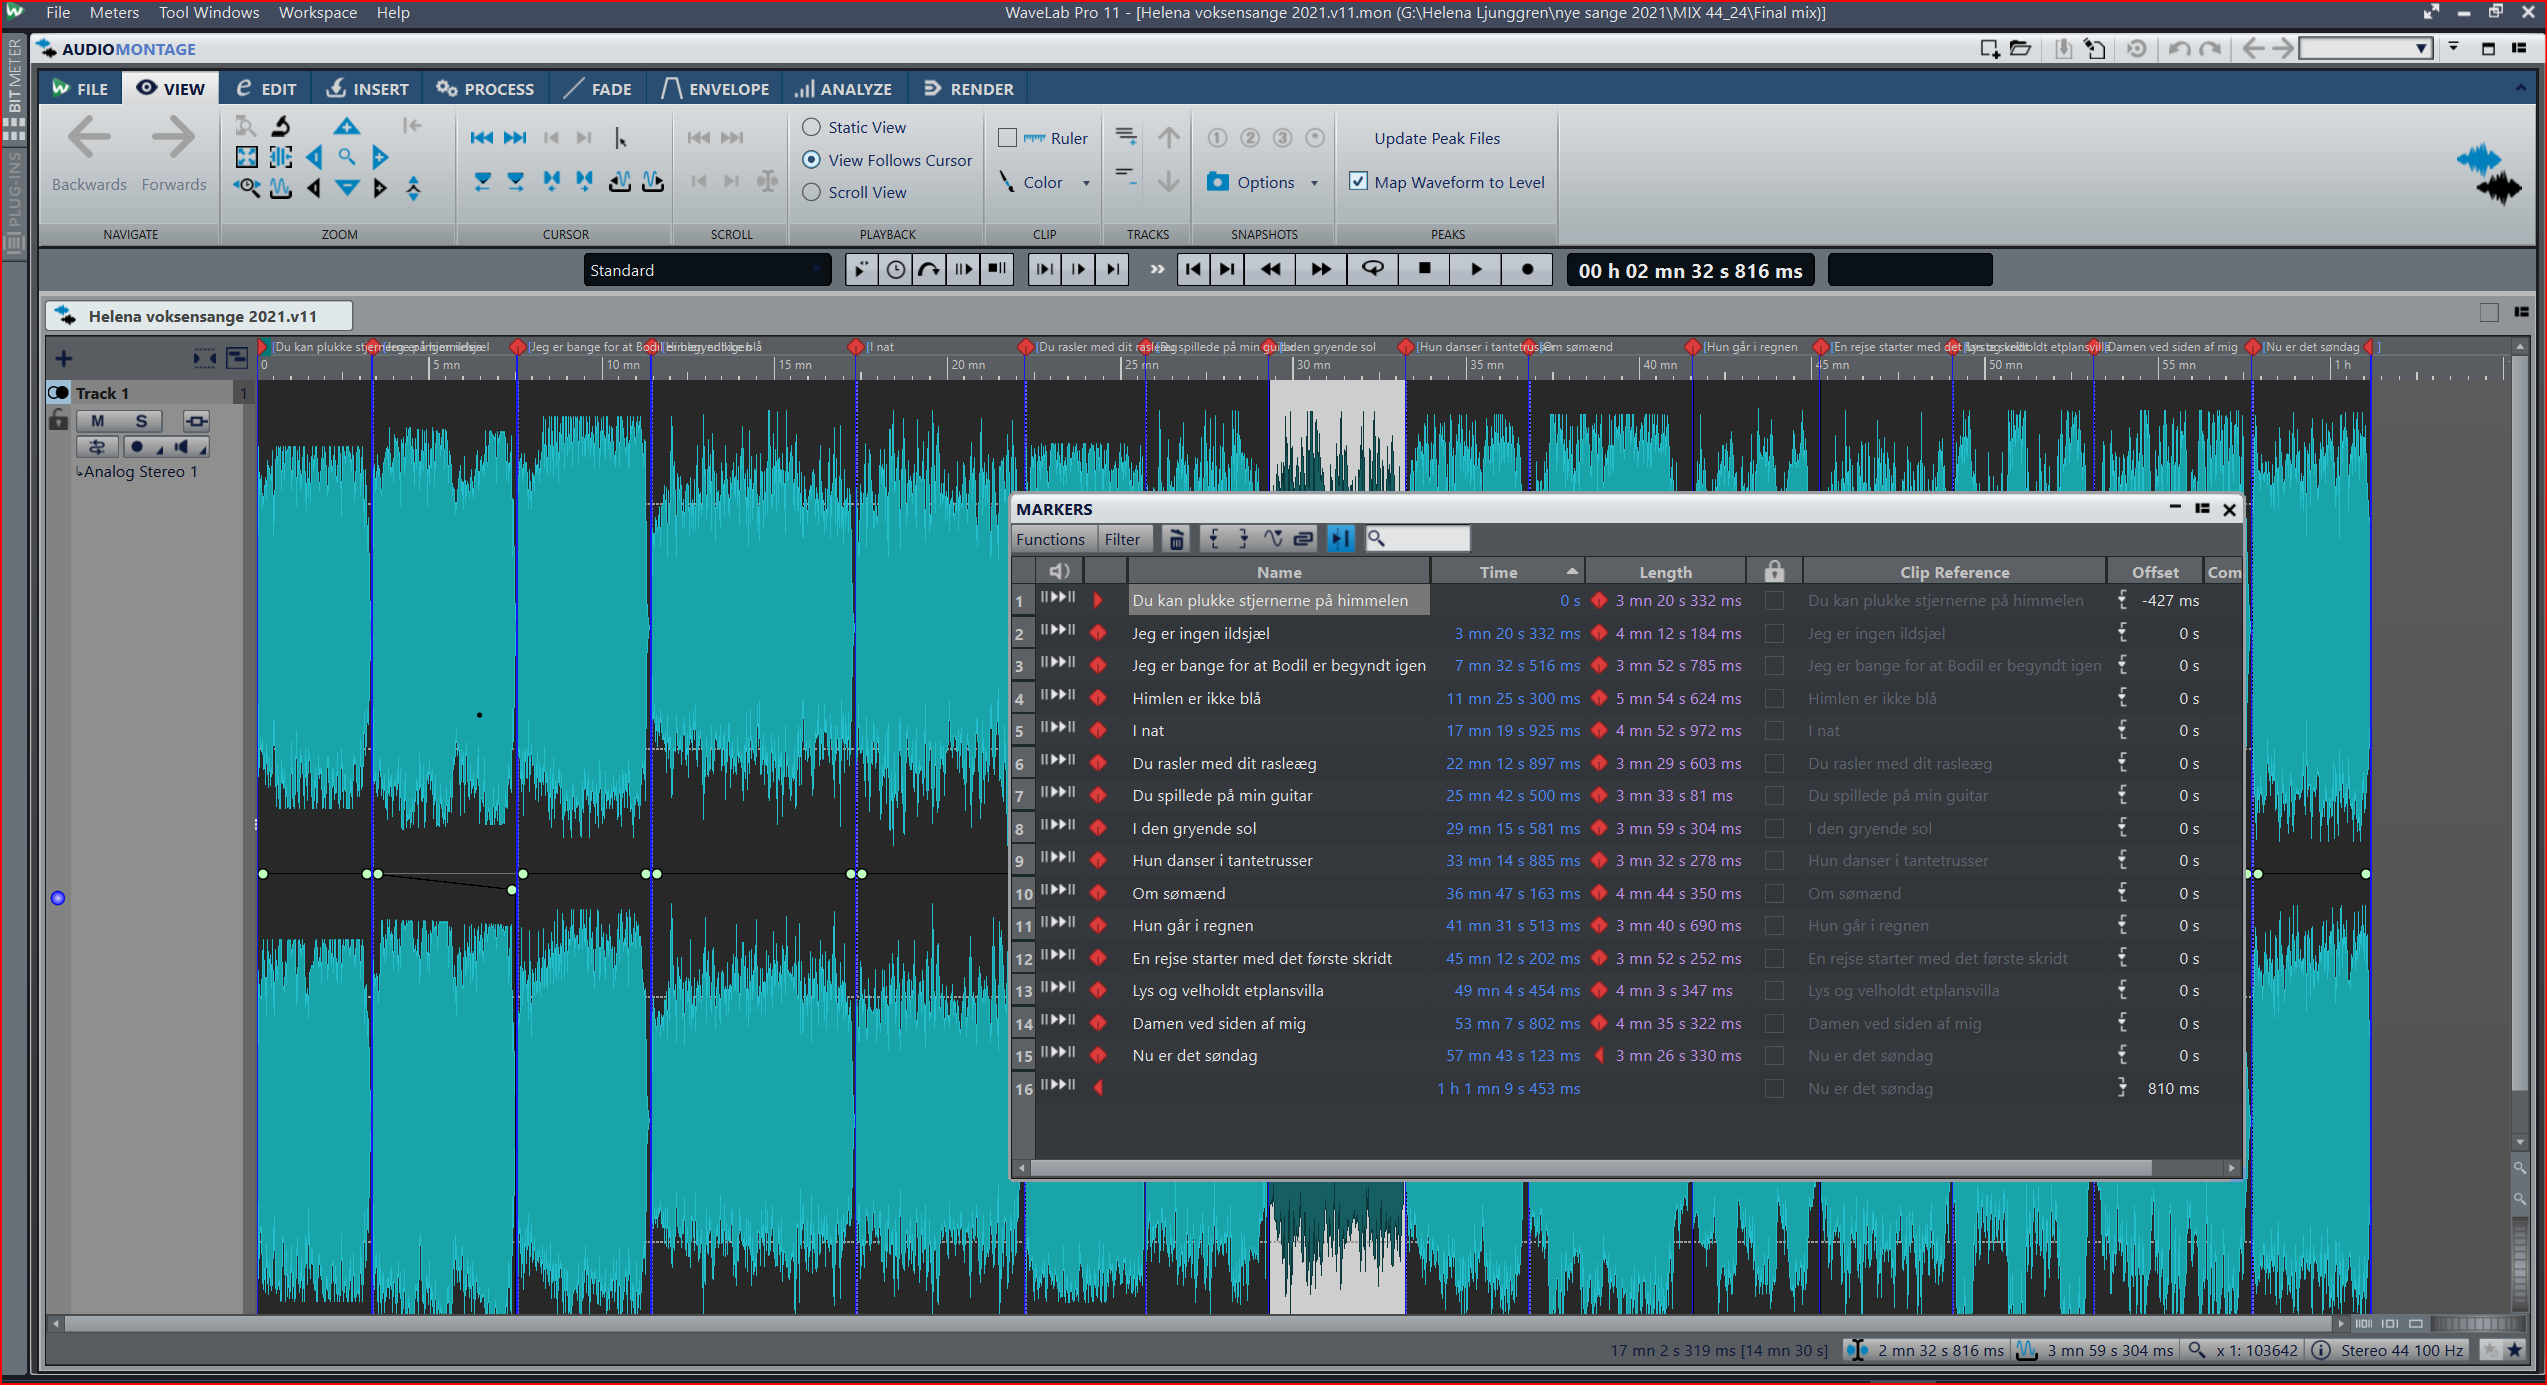
My wavelab looks completely different from yours…
Check!
I have these options- which one should I choose ?

Metadata from the montage:
Still no luck ![]()
Use the “All Marked Regions” option shown in your first screen shot and choose “CD Tracks”.
Can you share a screen shot of your CD Tab? Can you share a screen shot of your entire WaveLab window with the Markers Tab also showing?
FWIW, the Sonoris ISRC app only reads codes embedded in the AXML section, not the ID3v2 section. I put the code in both places for good measure.
YES! - that did the trick ![]()
Thank you ever so much ![]()
Here are screenshots:

I wish my WL looked like yours - you sometime ago uploaded a file called “JP Start.dat”. Would that do it - and how do I get it into WL ?
Yes, it looks like your markers and overall layout are very clean and in good shape. Sometimes people mistakenly render “All Clips” or “Selected Clips” but when mastering an EP or album (in my opinion) it’s really important that you’re rendering the “CD Tracks” so that among other things, all the space between the clips (songs) is included and flow between songs is correct for the streaming master vs. the CD/vinyl etc. Plus as you found out, the metadata population mostly occurs when rendering “CD Tracks” vs. anything else.
I’m using the Dark Theme for WaveLab which you can choose in the Preferences. Also, all my presets, settings, metadata preset etc. are available here:
And here is a video that talks about using some or all of my presets and getting them into your WaveLab Preferences Folder:
Great - thank you so much!!
But I have another problem now…
I put in performername, songname etc before rendering as cd text, but that didn’t make it into the metadata.
How do I do that ?
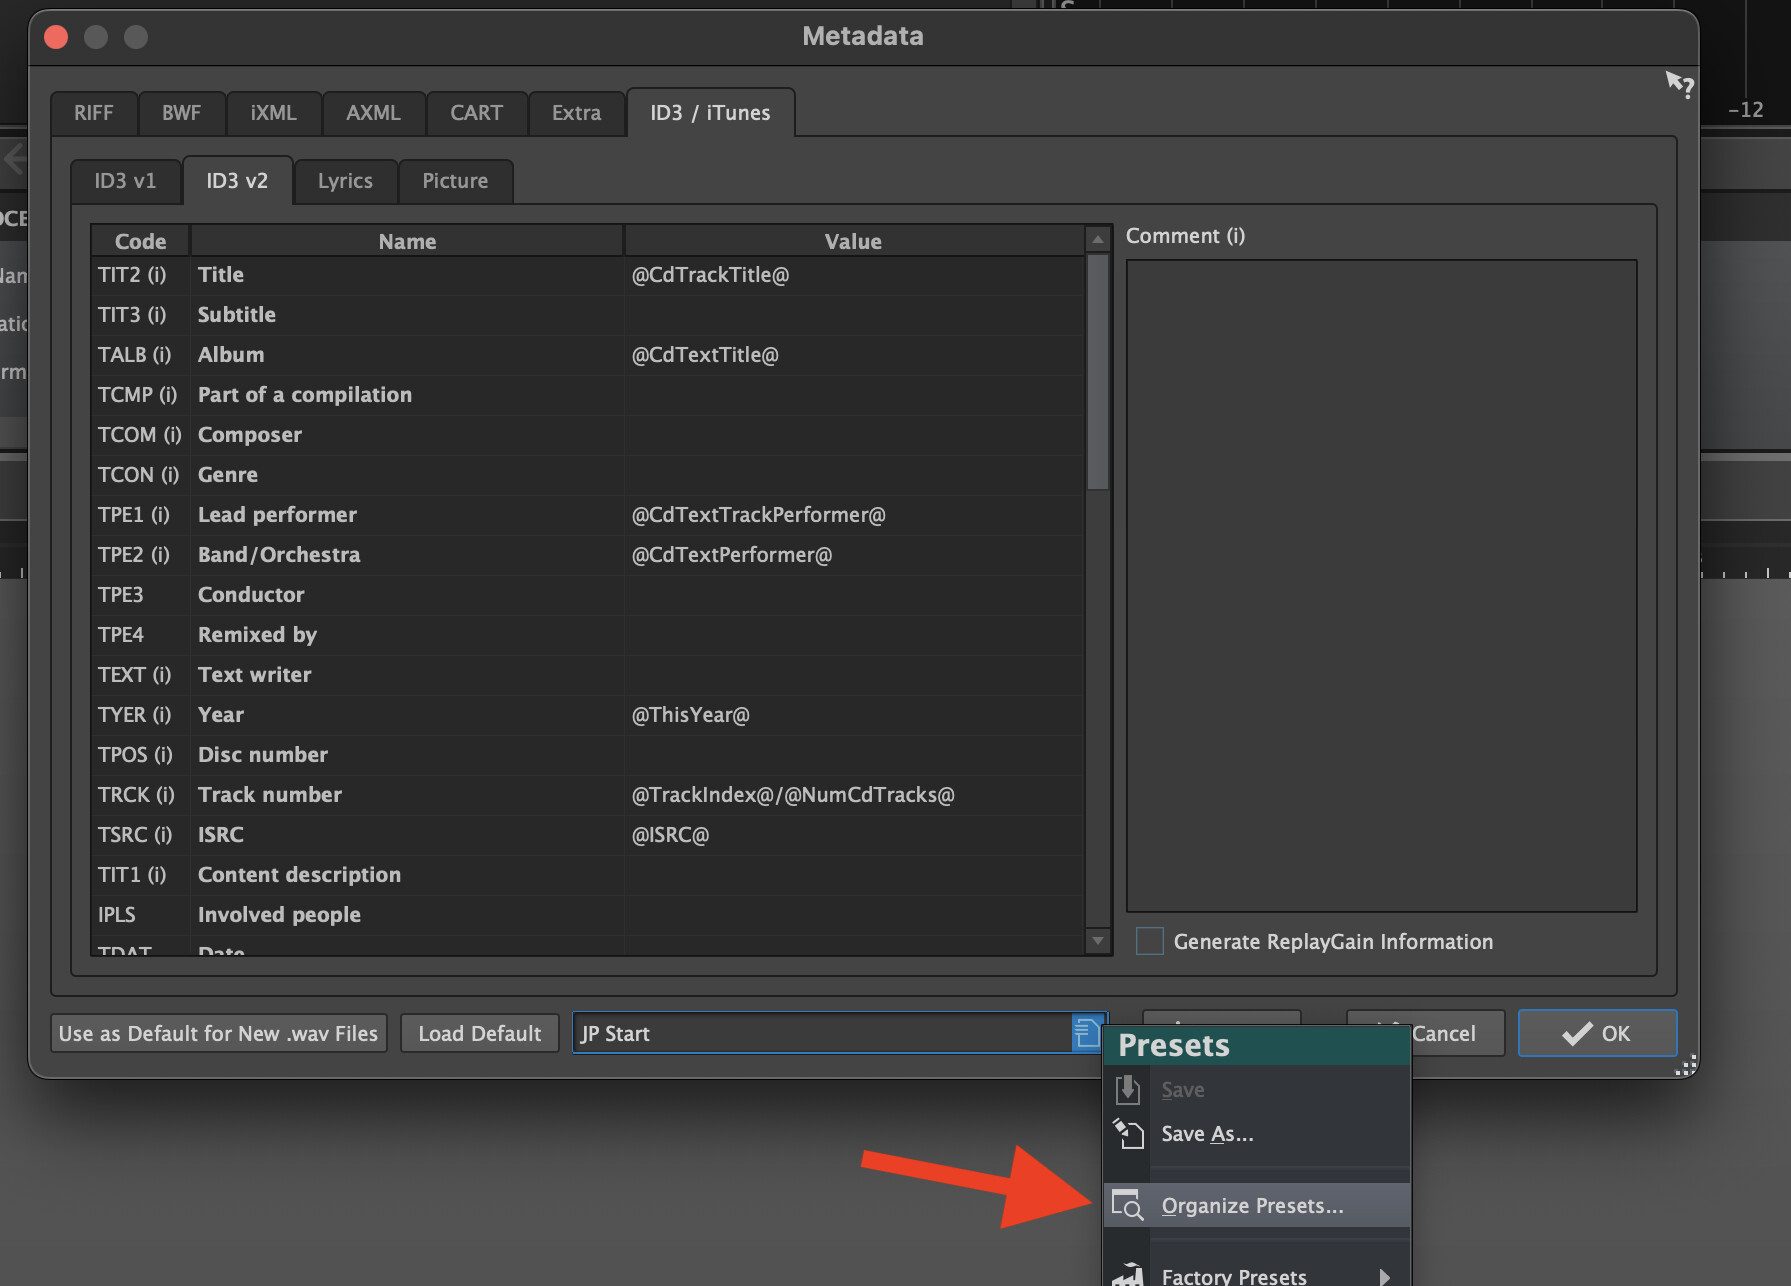
You need to program that in the Metadata Tab of the Audio Montage before rendering, as you see here. You can customize it to your liking. Or, you can go to the Organize Presets Tab which will expose on your system where WaveLab stores Metadata presets, and manually put my metadata preset in your folder. You can download it here:
https://www.dropbox.com/s/sbet6y9oqx12ld6/JP%20Start.dat?dl=1
Once you move it to the correct sub-folder in your WaveLab Preferences folder, it should now be an option in your presets list. You can even save a default montage template so this Metadata preset is always loaded when you make a new montage which saves time. The only time I go into the Metadata Tab is to add project specific artwork, or to show people how to handle metadata in WaveLab. Much of it can be automated and never thought about.
I highly suggest watching the Metadata video and the Preferences & Settings videos I linked above. It will save you much time.
Hi Justin,
thank’s to you I got everything right now ![]()
I downloaded your preferences and they work like a treat!
I can’t thank you enough for all your help!
If you need a bassplayer let me know ![]()
Mads
1 Like
No problem. I agree that it’s a little tricky to get it setup the first time and could be simpler. However, once you get the right metadata preset dialed in and make that already active in your new default montage template, it all becomes pretty automatic and not something you have to really think about.
As mentioned, I never even go into the Metadata Tab except to add artwork now and then.
I appreciate the bass offer as well!