User Manual
Introduction
Pages
- Mixer
- Track
- Sends
- Instrument
Installation
Install the Syx
To Enable the Script one will need to first download and install the Novation Components Application or use the on-line Components web app:
https://components.novationmusic.com/launch-control-xl-mk2/templates
Select Launch Control XL from “Choose your Product.”:
And then Upload Template LCXL_OQ.syx:

It Should look something like this:

Now select “Send to Launch Control”, and select Template 8.
Select Template 8 on your Launch Control: By pressing “Templates User” and then 8 on the bottom row of buttons. Here Lit brighter.
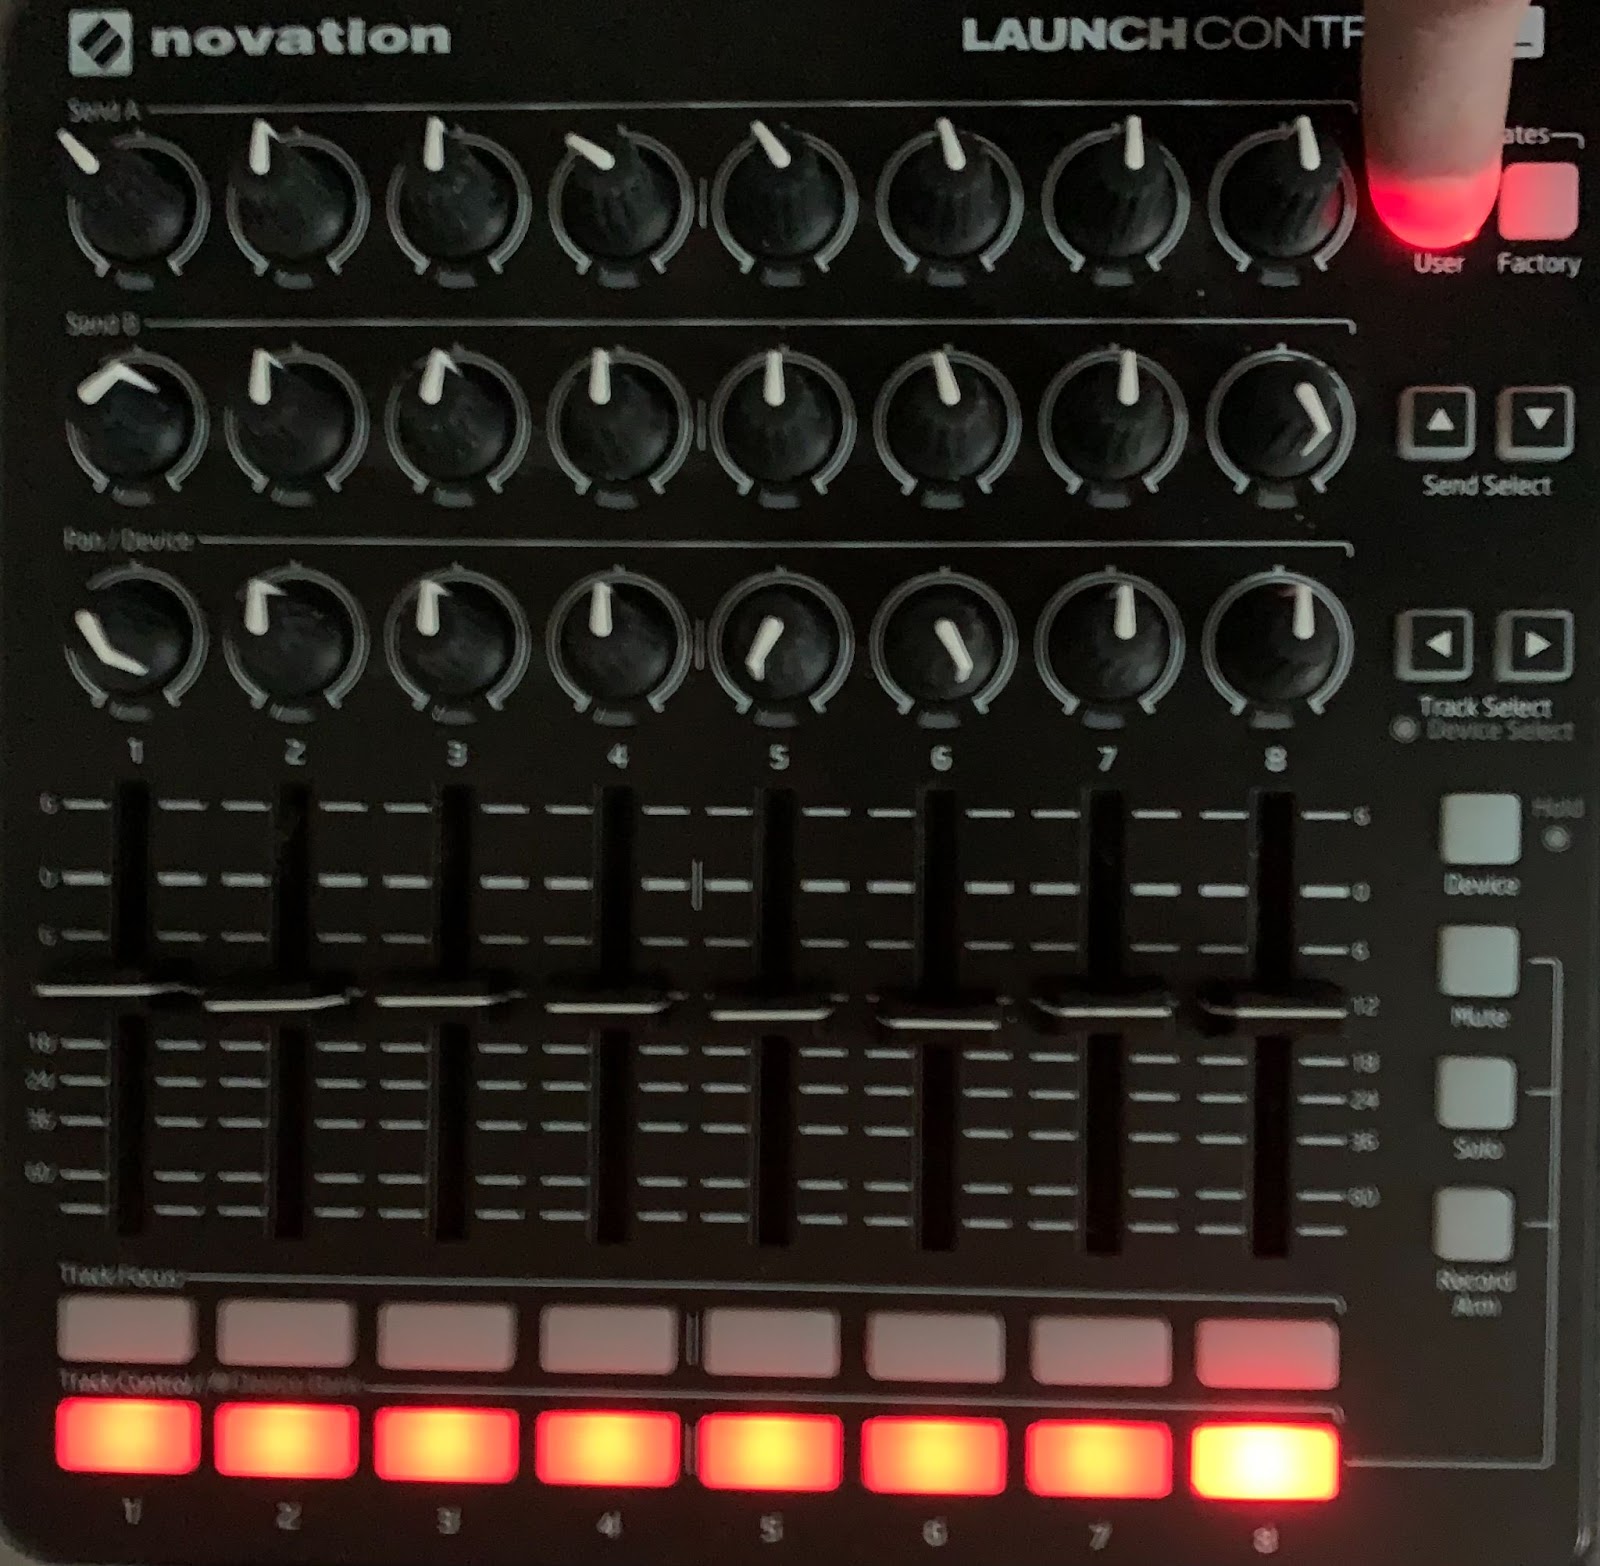
Your Launch Control should now look something like this: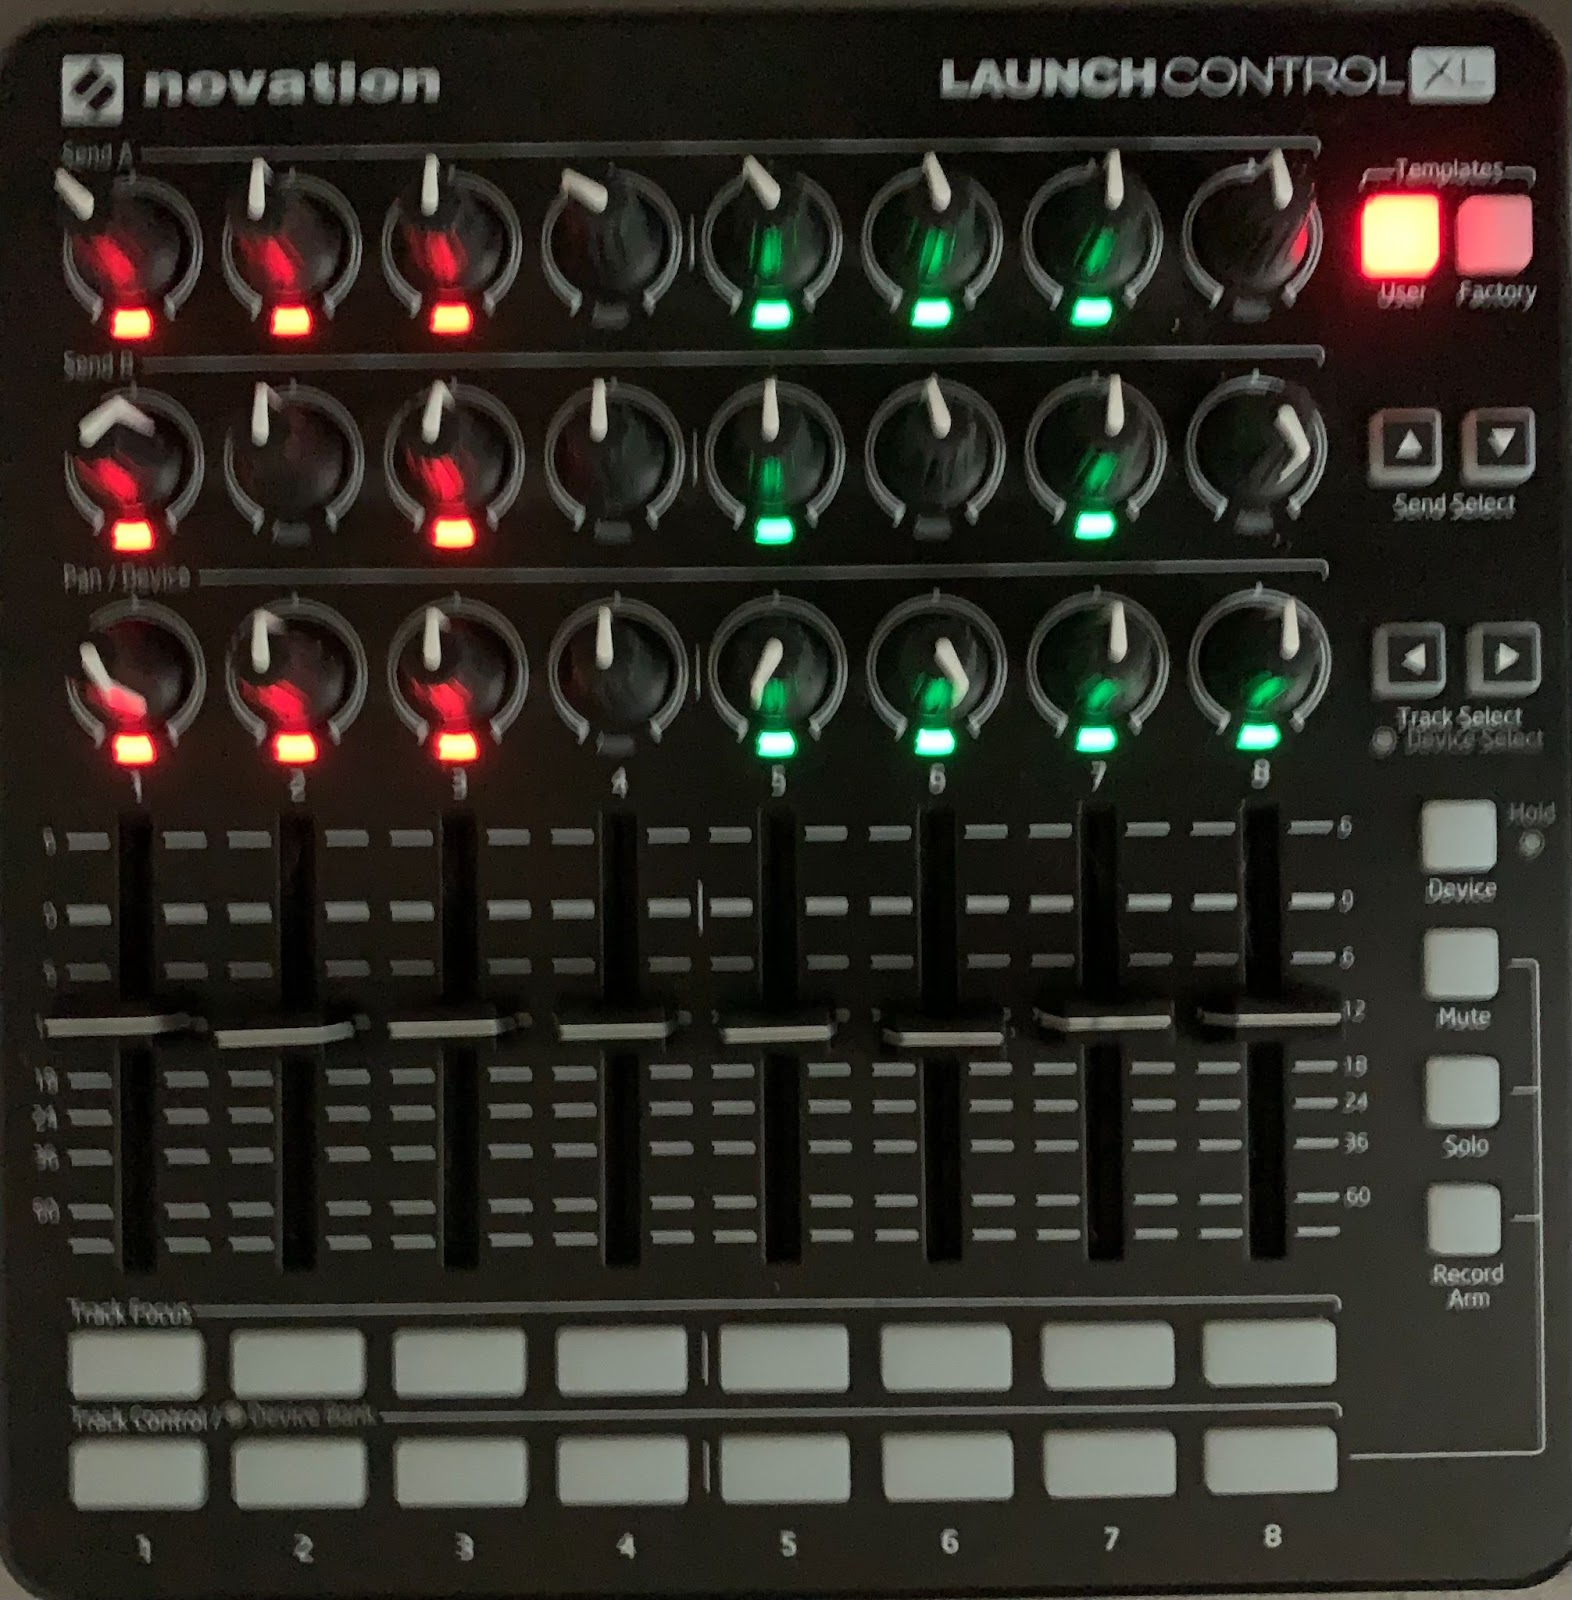
The Launch Control is now set up, and ready to go.
Install the script
In Cubase, within the MIDI Remote tab, Open the MIDI Remote Manager:
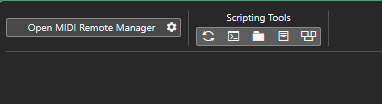
Select Import Scripts: 
Navigate to wherever you have saved the file:
Novation_Launch Control XL.midiremote
And import that Script.
Your MIDI Remote tab should now show something like this: 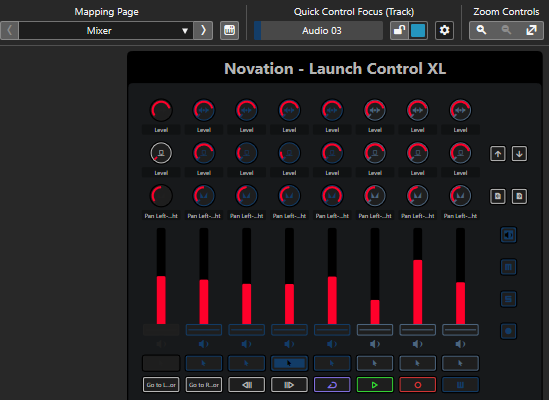
Colour Chart
The Launch Control is capable of a limited Palette. Care has been taken to provide as many colours as possible.
The buttons on the right of the device are not capable of displaying all of the colours. The arrowed button can only display red, and the state buttons can only display amber and yellow.
The buttons along the bottom are capable of all colours listed, but always show Yellow High when selected, or “On”.
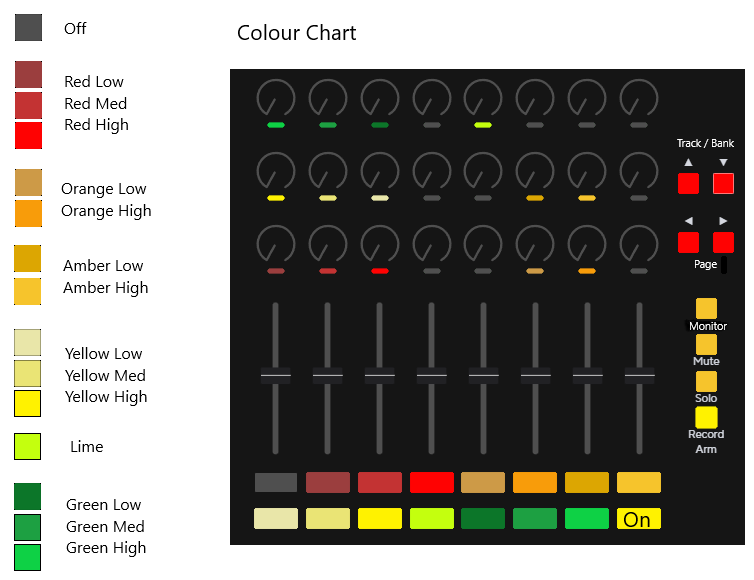
Colours take on meanings, and when they do a similar chart will be provided with the meanings listed.
All pages
On all of the pages the Following Controls are consistent.
Track and Bank Buttons
The Up and Down Arrows will always move the track or bank to the Next or Previous.
Page Select Buttons
The Left and Right Arrows will always select the Next or Previous Page
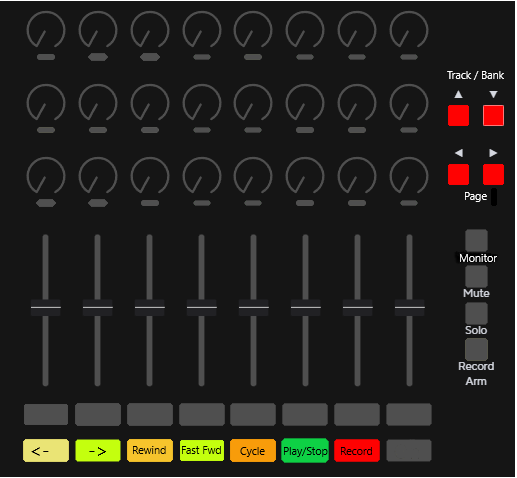
Transport Buttons
The 7 leftmost lower Buttons are always the transport analogous to the transport in Cubase.

The Rewind and Fast Forward buttons are momentary, and the cursor will stop when they are released.
The Play and Stop buttons have been combined to provide a Play/Stop Toggle.
Track Buttons
The Monitor, Mute, Solo and Record Arm buttons are toggles and will be Off when not engaged, and Yellow when engaged (Except on the Instrument page where they are always Amber, and will function for any Track type.)
These buttons will always affect the currently selected track.
Knob Pickup Behavior
Most Knobs that affect variables are set to “pickup” mode.
In this mode the LED will show dim or Low when the value within cubase does not match the position of the knob, or when the difference is unknown by the script.
When the position of the knob and the value within Cubase are known to be the same, the LED will show High.
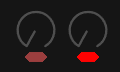
In this image the position of the knob on the left does not match the value in Cubase, but the knob on the right does.
Mixer Page
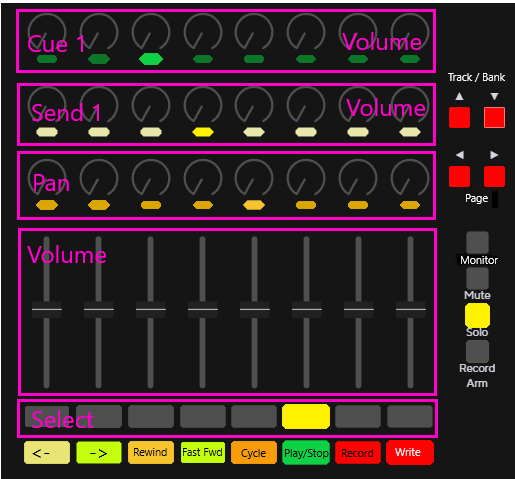
Cue 1
The top row of knobs controls the level of Cue 1 level for the given track.
Send 1
The middle row of knobs controls the level of Send 1 level for the given track.
Pan
The lower row of knobs controls the level of Pan for the given track.
Volume
The Faders control the volume in Scaled mode. The difference between the Cubase value and the position of the fader will close as the fader is moved until they are the same, and then the fader will move the volume of the track in sync.
Select
Pressing one of these buttons will select the given track.
Write
This red button at the lower right, will toggle the write state of the Selected Track.
Track Page
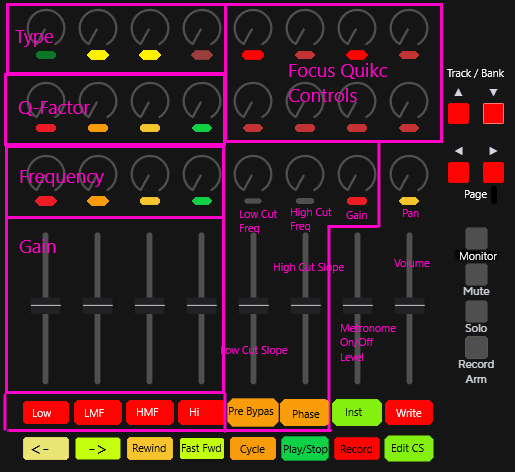
The Track Page provides control over much of the available Track Controls.
The controls on this page are typically specific to the selected track.
It is split into several sections EQ, Quick Controls, Pre, Track Strip, and has the addition of a Metronome Control.
Metronome
When all the way in the down position, this fader will turn on, or off the Metronome. (When using the Control Room make sure to have the Control Room Metronome enabled at all times.)
When not in the down position this fader changes the level of the metronome.
Focus Quick Controls (FQC)
These knobs control the Focus Quick Controls in pickup mode (bright when captured). 1-4 across the top, and 5-8 along the middle.
Focus Quick Controls were selected here because they provide control over whatever is in focus, including Track Quick Controls, where as Track Quick Controls can only modify the selected track.
Pan
Sets the pan of the selected track.
Volume
Sets the Volume of the selected track.
Write
Toggles the Write mode of the selected track.
Instrument (Inst)
Toggles the Instrument window on instrument tracks.
Edit (Edit CS)
Toggles the Edit or Channel Strip window of the selected track.
Pre
Gain
This knob controls the Gain in pickup mode (bright when captured).
Pre Bypass
This button enables the Pre section when lit.When Orange the Pre is bypassed, when Yello, the Pre section is enabled.
Phase
This button inverts the phase of the channel. When Yellow the phase is inverted.
Low Cut Frequency
This Knob acts as both an on/off switch as well as the frequency setting for the Low Cut in pickup mode.
When all the way to the left, the Low Cut is off, and the LED will be turned off.
When not all the way to the left, the Lo cut frequency is being selected.
The colour of it’s LED indicates the Filter Slope.(see below)
Hi Cut Frequency
This Knob acts as both an on/off switch as well as the frequency setting for the High Cut in pickup mode.
When all the way to the right, the Low Cut is off, and the LED will be turned off.
When not all the way to the right, the High cut frequency is being selected.
The colour of it’s LED indicates the Filter Slope. (see below)
Low Cut Slope
This fader selects the Low Cut Slope. When the slope is changed the Low Cut Frequency LED will change colour to indicate the slope being used. (see below)
High Cut Slope
This fader selects the High Cut Slope. When the slope is changed the High Cut Frequency LED will change colour to indicate the slope being used. (see below)
Slope Colour Chart
The Frequency Knob will show high colour for captured, and low colour for not captured, just like all the other pickup mode knobs, but it’s colour will change to represent the frequency slope setting, by the fader just below it.

Equalizer (EQ)
The Cubase 4 band Equalizer can be controlled from this section of the Track page.
The columns are set up from left to right to control the Lo, LMF, HMF, and Hi bands.
Low Button
Turns On/Off the Low band, Yellow when on.Red when off.
LMFButton
Turns On/Off the LMFband, Yellow when on.Red when off.
HMFButton
Turns On/Off the HMF band, Yellow when on.Red when off.
Hi Button
Turns On/Off the Hi band, Yellow when on.Red when off.
Gain
These 4 faders control the Gain of the associated band.
Frequency
These 4 knobs control the Frequency of the associated band.
Q-Factor
These 4 knobs control the Q-Factor of the associated band.
Type
These 4 knobs control the EQ type of the associated band.
The LED on these knobs are Colour Coded. (see below)
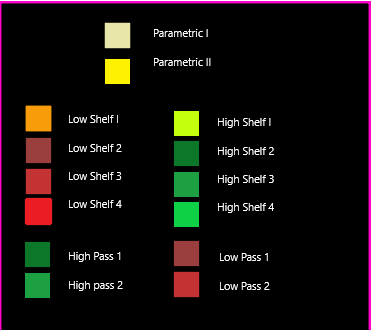
EQ Type Colour chart
All 4 bands can be set to Parametric, the Low band can be set as well to the types on the left, and the Hi can be set to the types on the right, in addition to the two Parametric Types. The orders match that in Cubase.
Sends Page
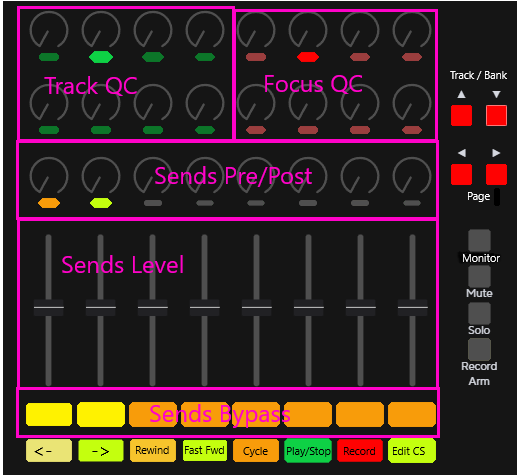
The Sends Page allows control over up to 8 sends on the selected track, as well as Both Focus and Track Quick Controls.
Edit (Edit CS)
Toggles the Edit or Channel Strip window of the selected track.
Focus Quick Controls (FQC)
These knobs control the Focus Quick Controls in pickup mode (bright when captured). 1-4 across the top, and 5-8 along the middle.
Track Quick Controls (FQC)
These knobs control the Track Quick Controls in pickup mode (bright when captured). 1-4 across the top, and 5-8 along the middle.
Sends Bypass
These buttons control Sends Bypass, Yellow when Send is engaged, and Orange when the Send is bypassed.
Sends Level
These Faders control Sends Level in Scaled Mode.
Sends Pre/Post
These knobs control whether the Send is Pre or Post fader.
When the Send is off, the LED is off.
When the knob is all the way to the left the send will be post fader, and the LED will be Orange.
When the knob is all the way to the right the send will be pre fader, and the LED will be Lime.

Pre Post Off
Instrument Page

The instrument Page allows for editing of Instrument and MIDI tracks. It’s Track controls will light up in a dark amber colour and work on MIDI tracks, but do not provide feedback.They also work for other tracks also without feedback.
There are 14 user programmable knobs in amber which will function as pickup knobs like the pre-programmed knobs they will light when captured.
There is also a nudge pallet, and loop or cycle control, as well as Track Quick Controls.
Note: (Track Quick Controls will not work with MIDI tracks.)
In addition the top right knob is the AI knob, and the knob underneath it works as a switch to lock the AI knob to a given control.
Focus Quick Controls (FQC)
These knobs control the Focus Quick Controls in pickup mode (bright when captured). They are the lowest knobs on this page
Track Quick Controls (FQC)
These Faders control the Track Quick Controls in scaled mode.
Instrument (Inst)
Toggles the Instrument window on instrument tracks.
Nudge Pallet
These Momentary buttons control the same feature as the nudge pallet in Cubase.

Loop Buttons
These Momentary Buttons shift the cycle left and right.
AI knob
AI Knob
The top AI knob will adjust the parameter over which the mouse is hovering.
AI Lock Switch
The middle AI lock switch will lock the AI knob when all the way to the right, and unlock the AI knob when all the way to the left.


